
Many of my quilt patterns are constructed using a popular machine sewing technique called Foundation Paper Piecing, also known as FPP. I love FPP because it allows you to create intricate and precise quilt top designs that would otherwise be challenging or impossible to achieve. By sewing fabric onto a paper foundation and using the lines as a guide, you can achieve accurate shapes and sharp points, making it one of my most favorite quilt piecing techniques. To help you with your FPP journey, today I’m going to give my top 5 tips for a smooth and enjoyable sewing experience.
But first, I wanted to share some of my recent FPP quilt pattern projects:
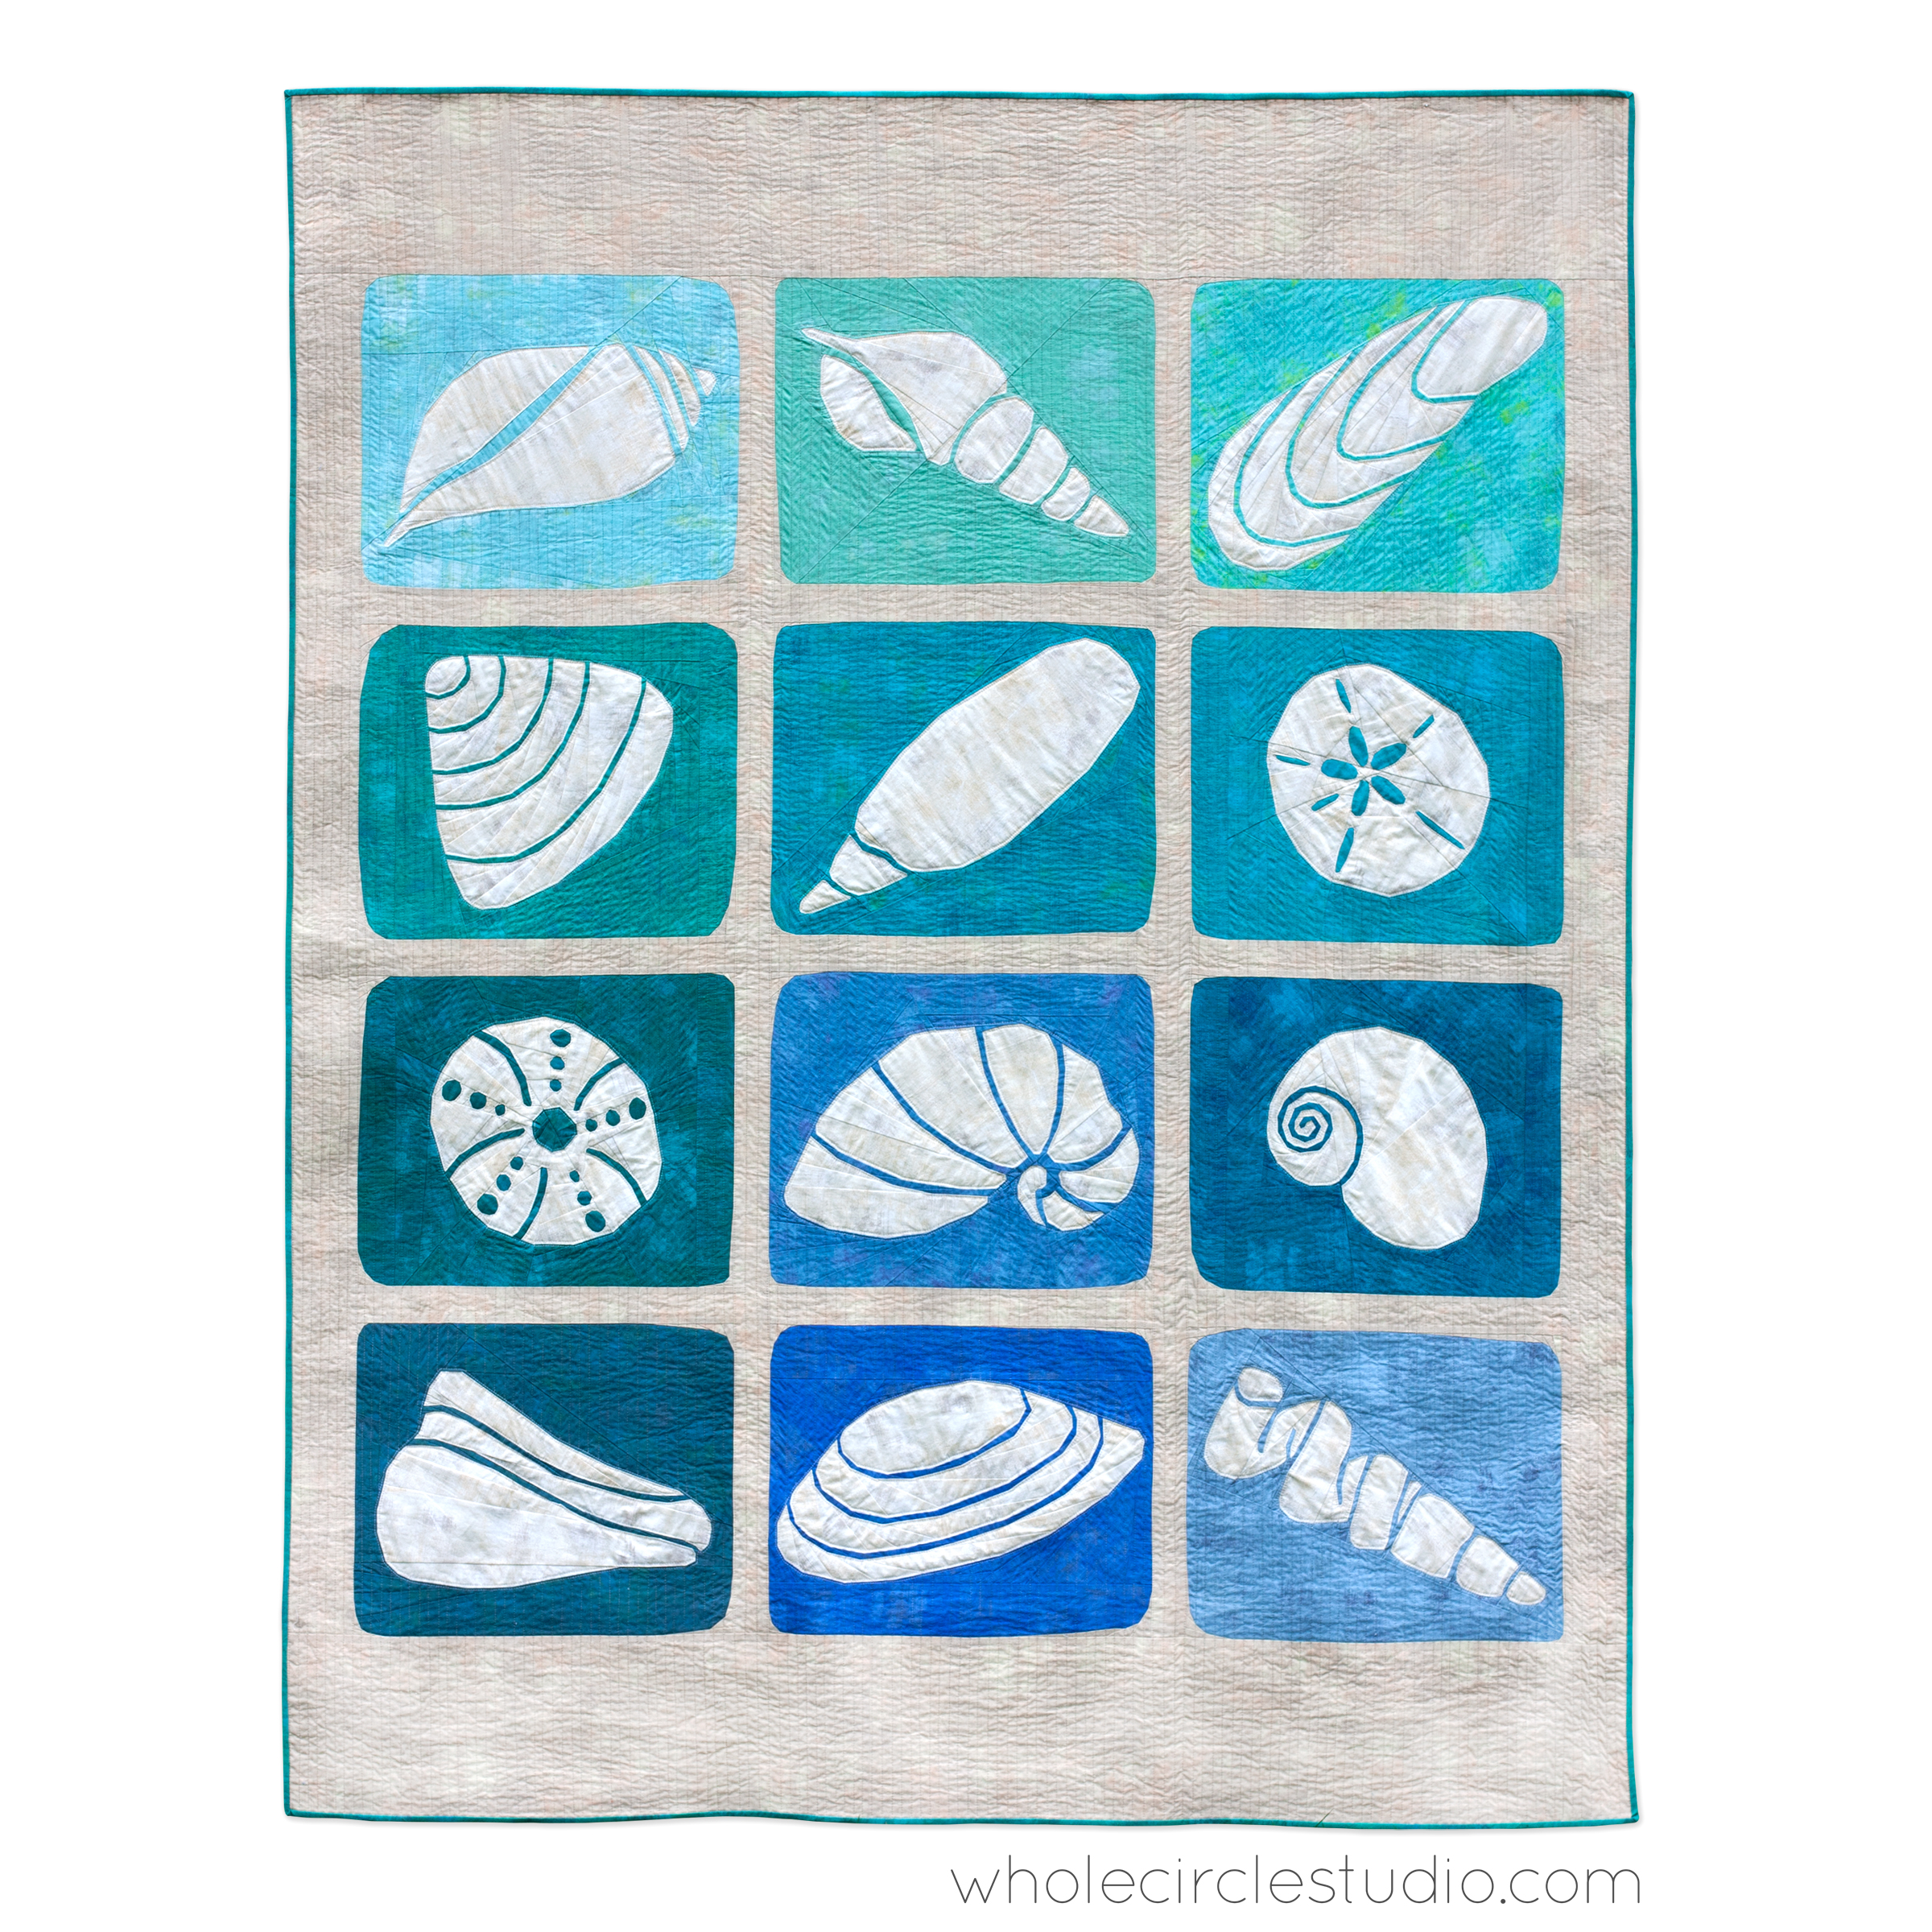
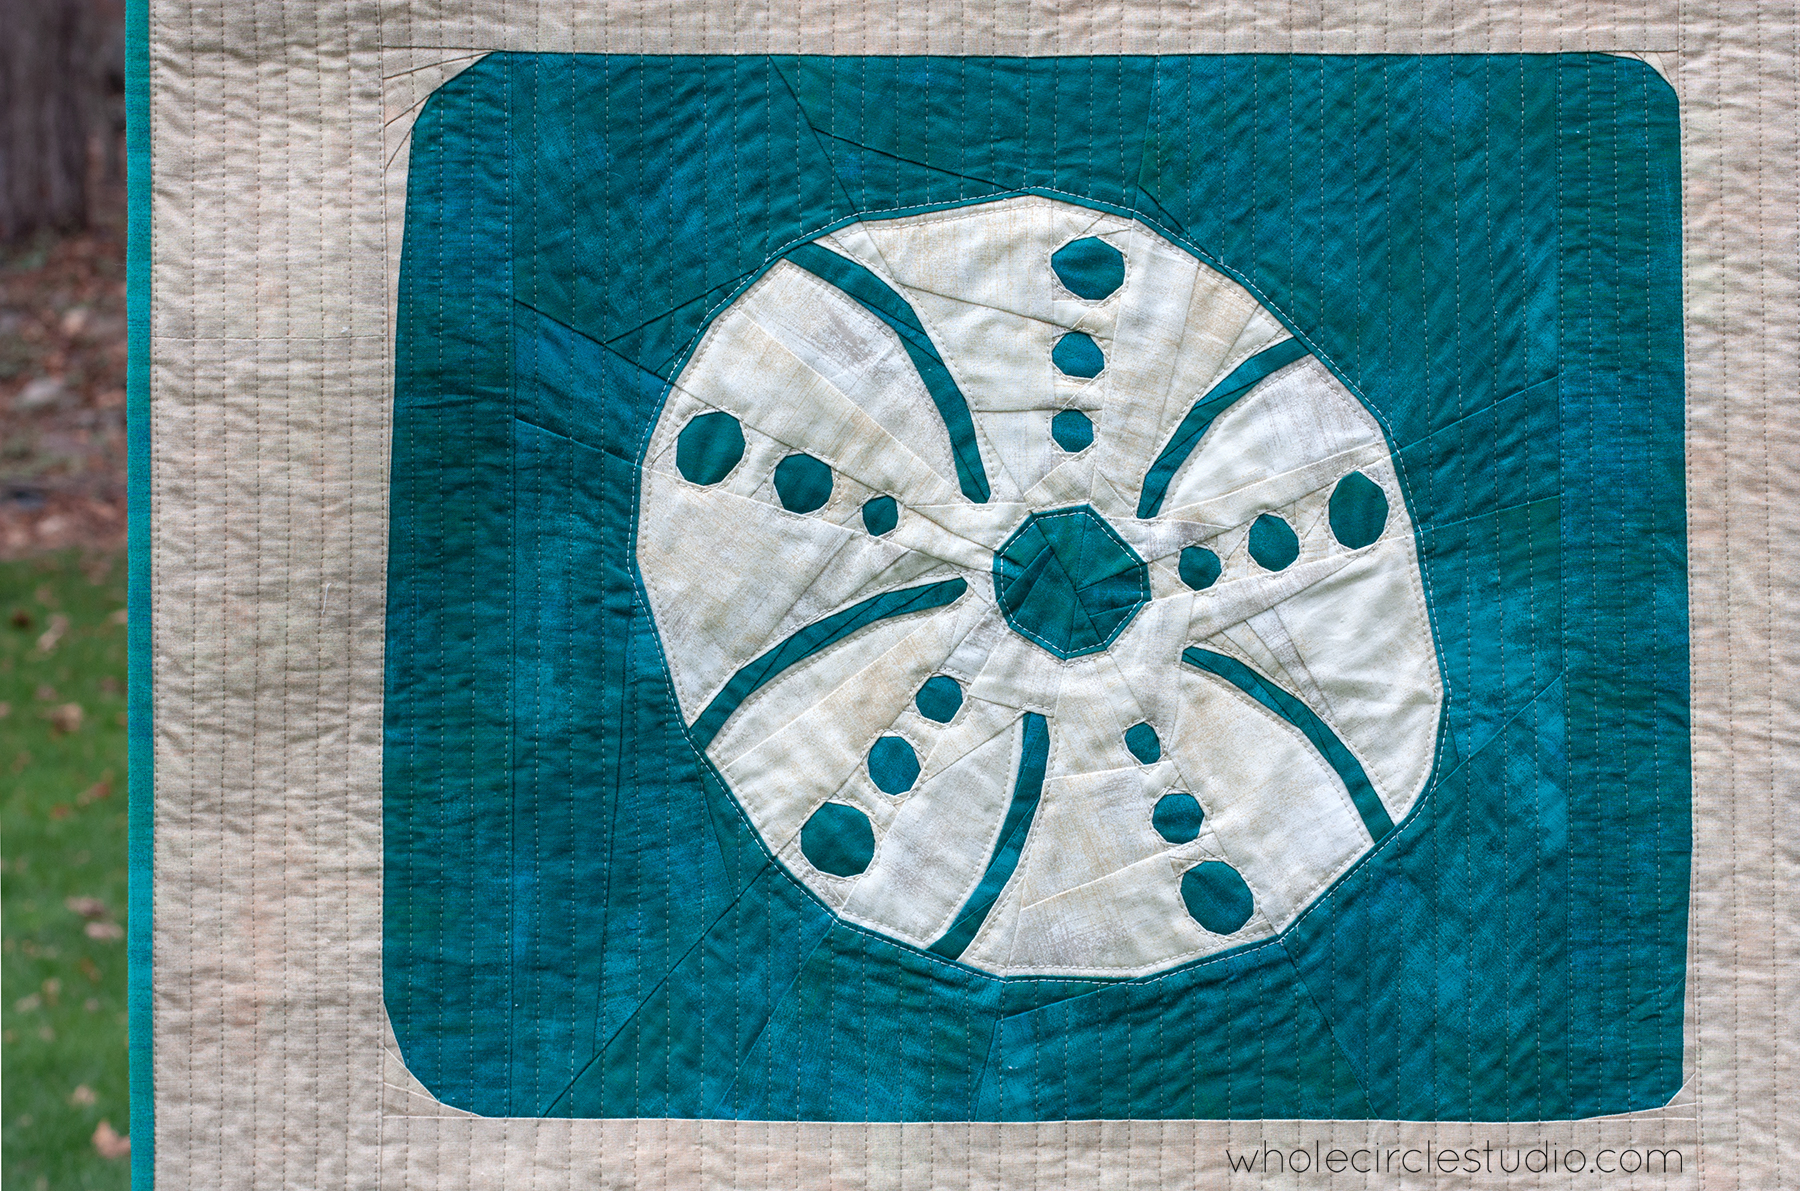
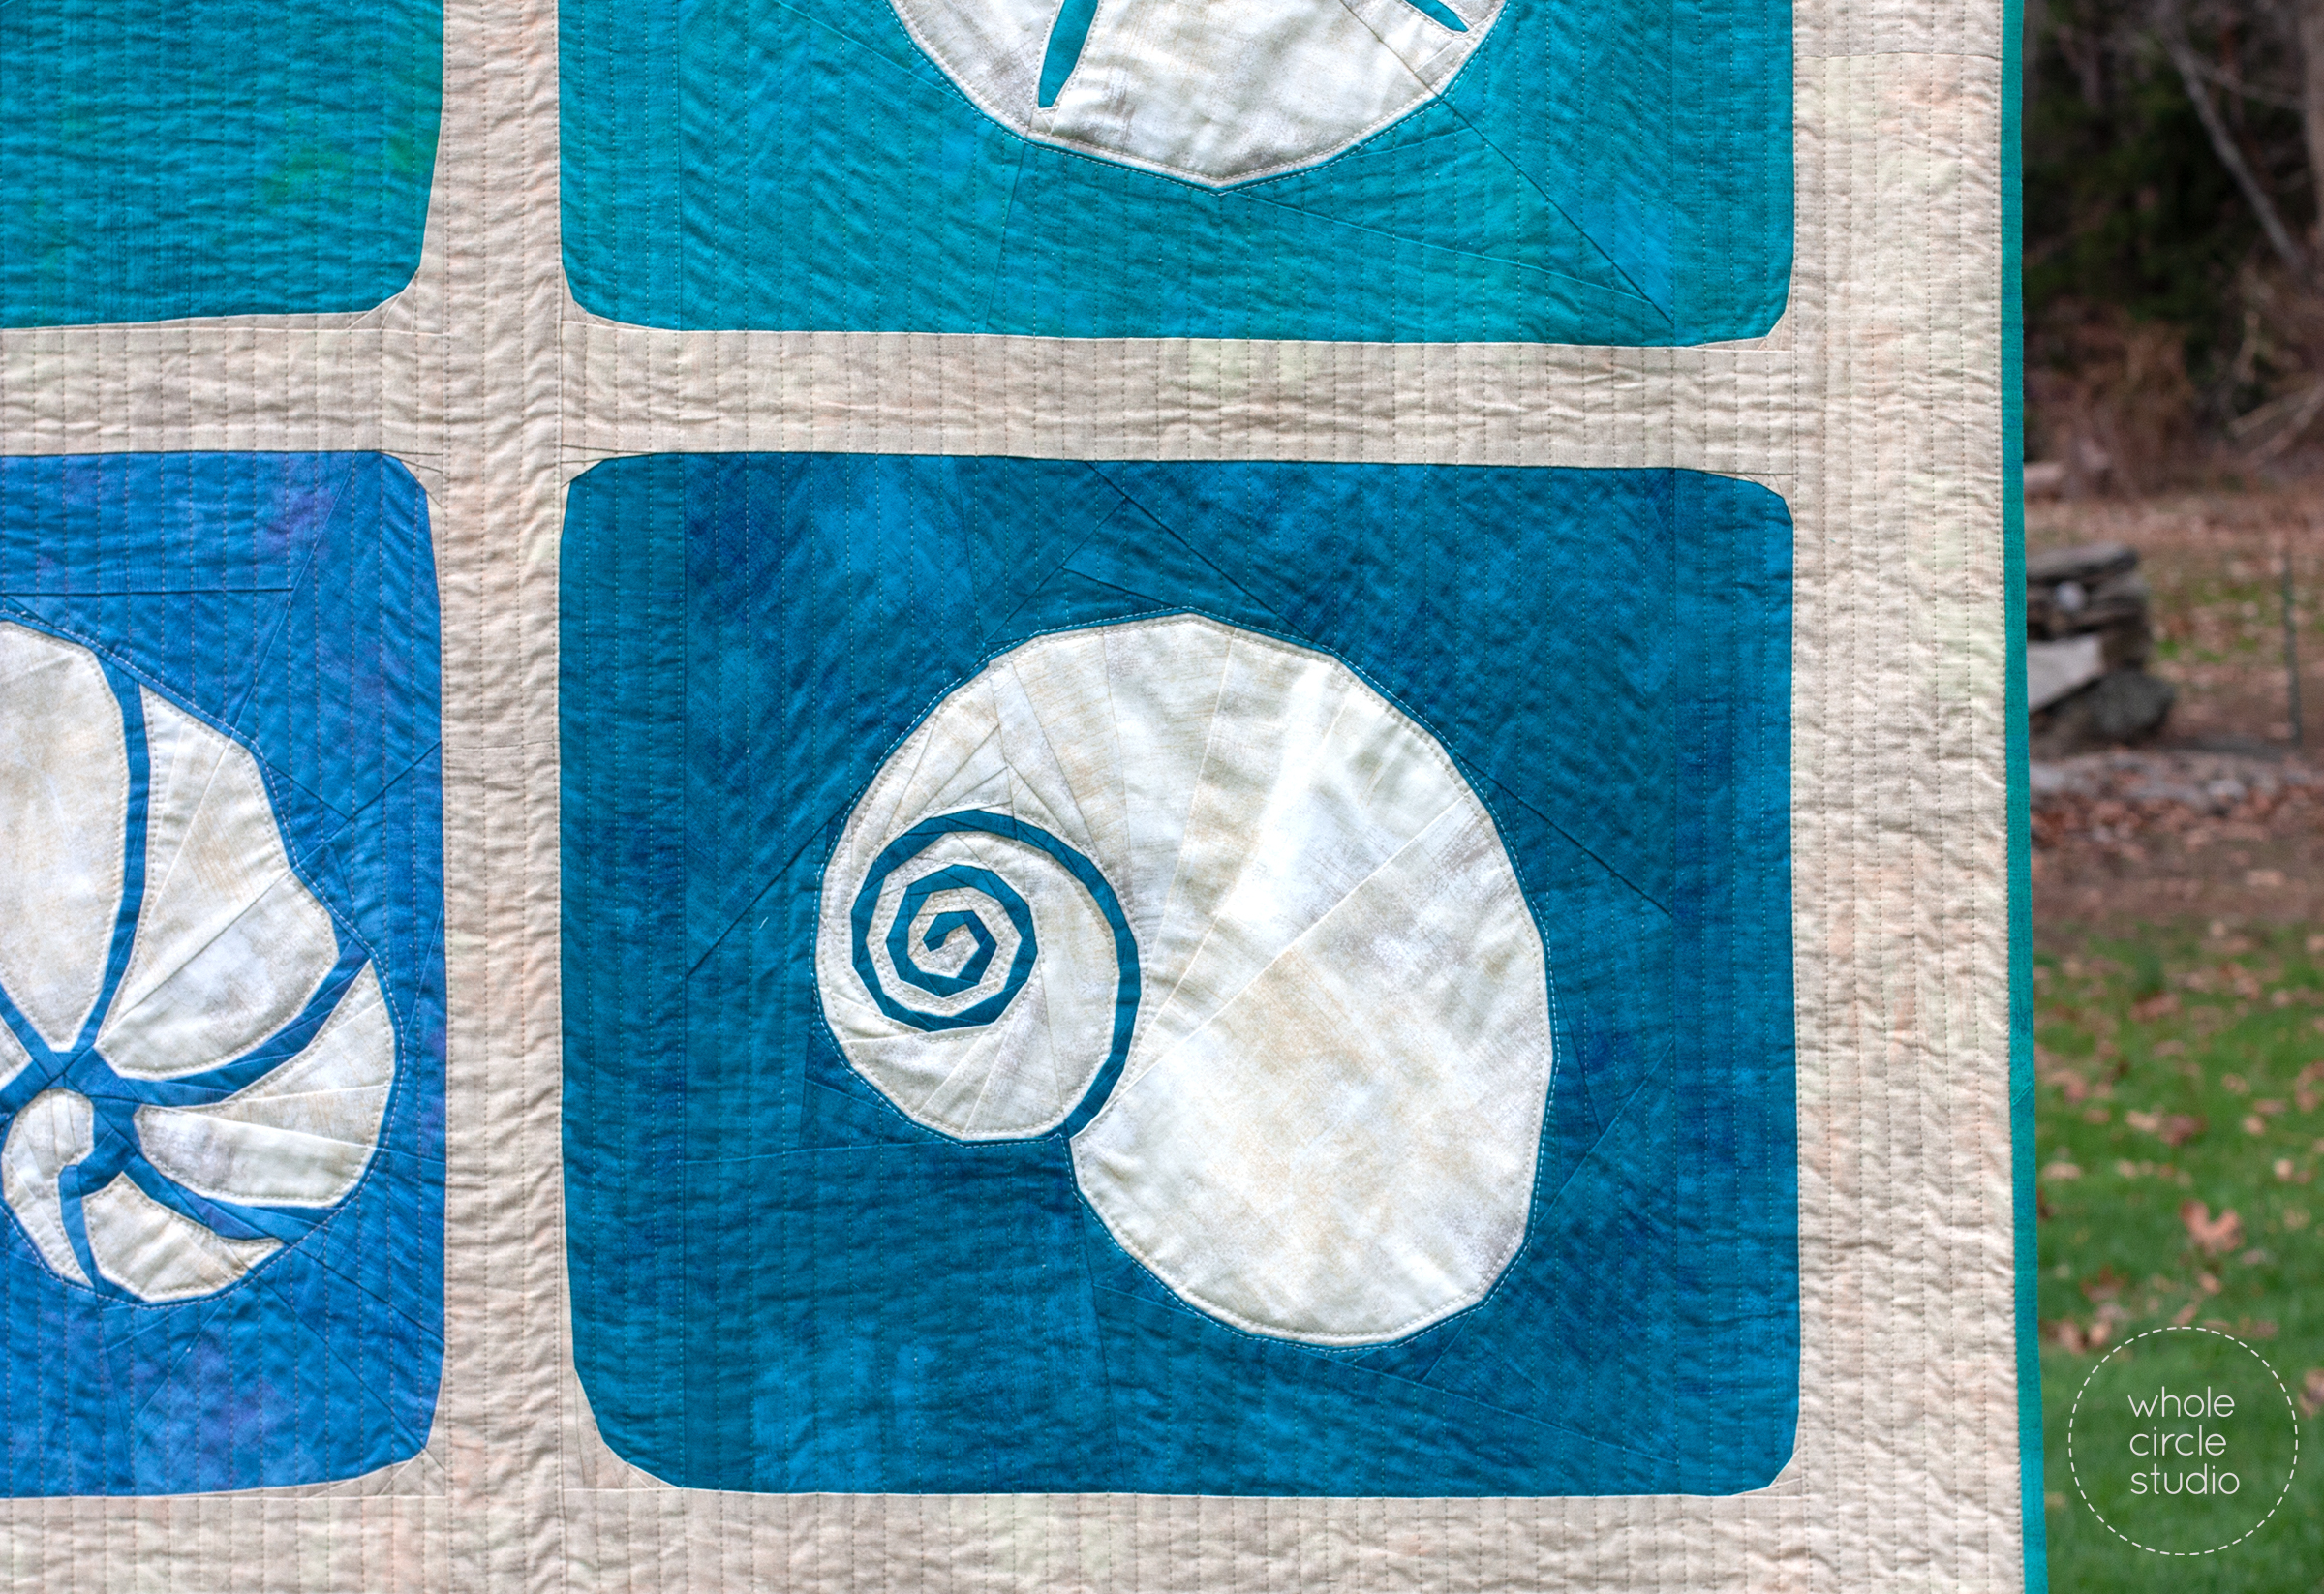
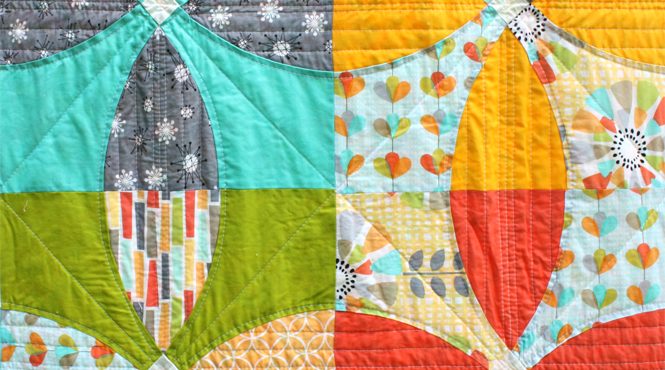
SHORELINE SHELLS is a quilt pattern celebrating the ebb and flow of the ocean and relaxing on the beach. It is entirely foundation paper pieced — all those curves are actually straight lines. The awesome thing about FPP, other than it being incredibly precise, is that you can machine sew a few straight lines near one another at angles and then it looks like it’s a curve.
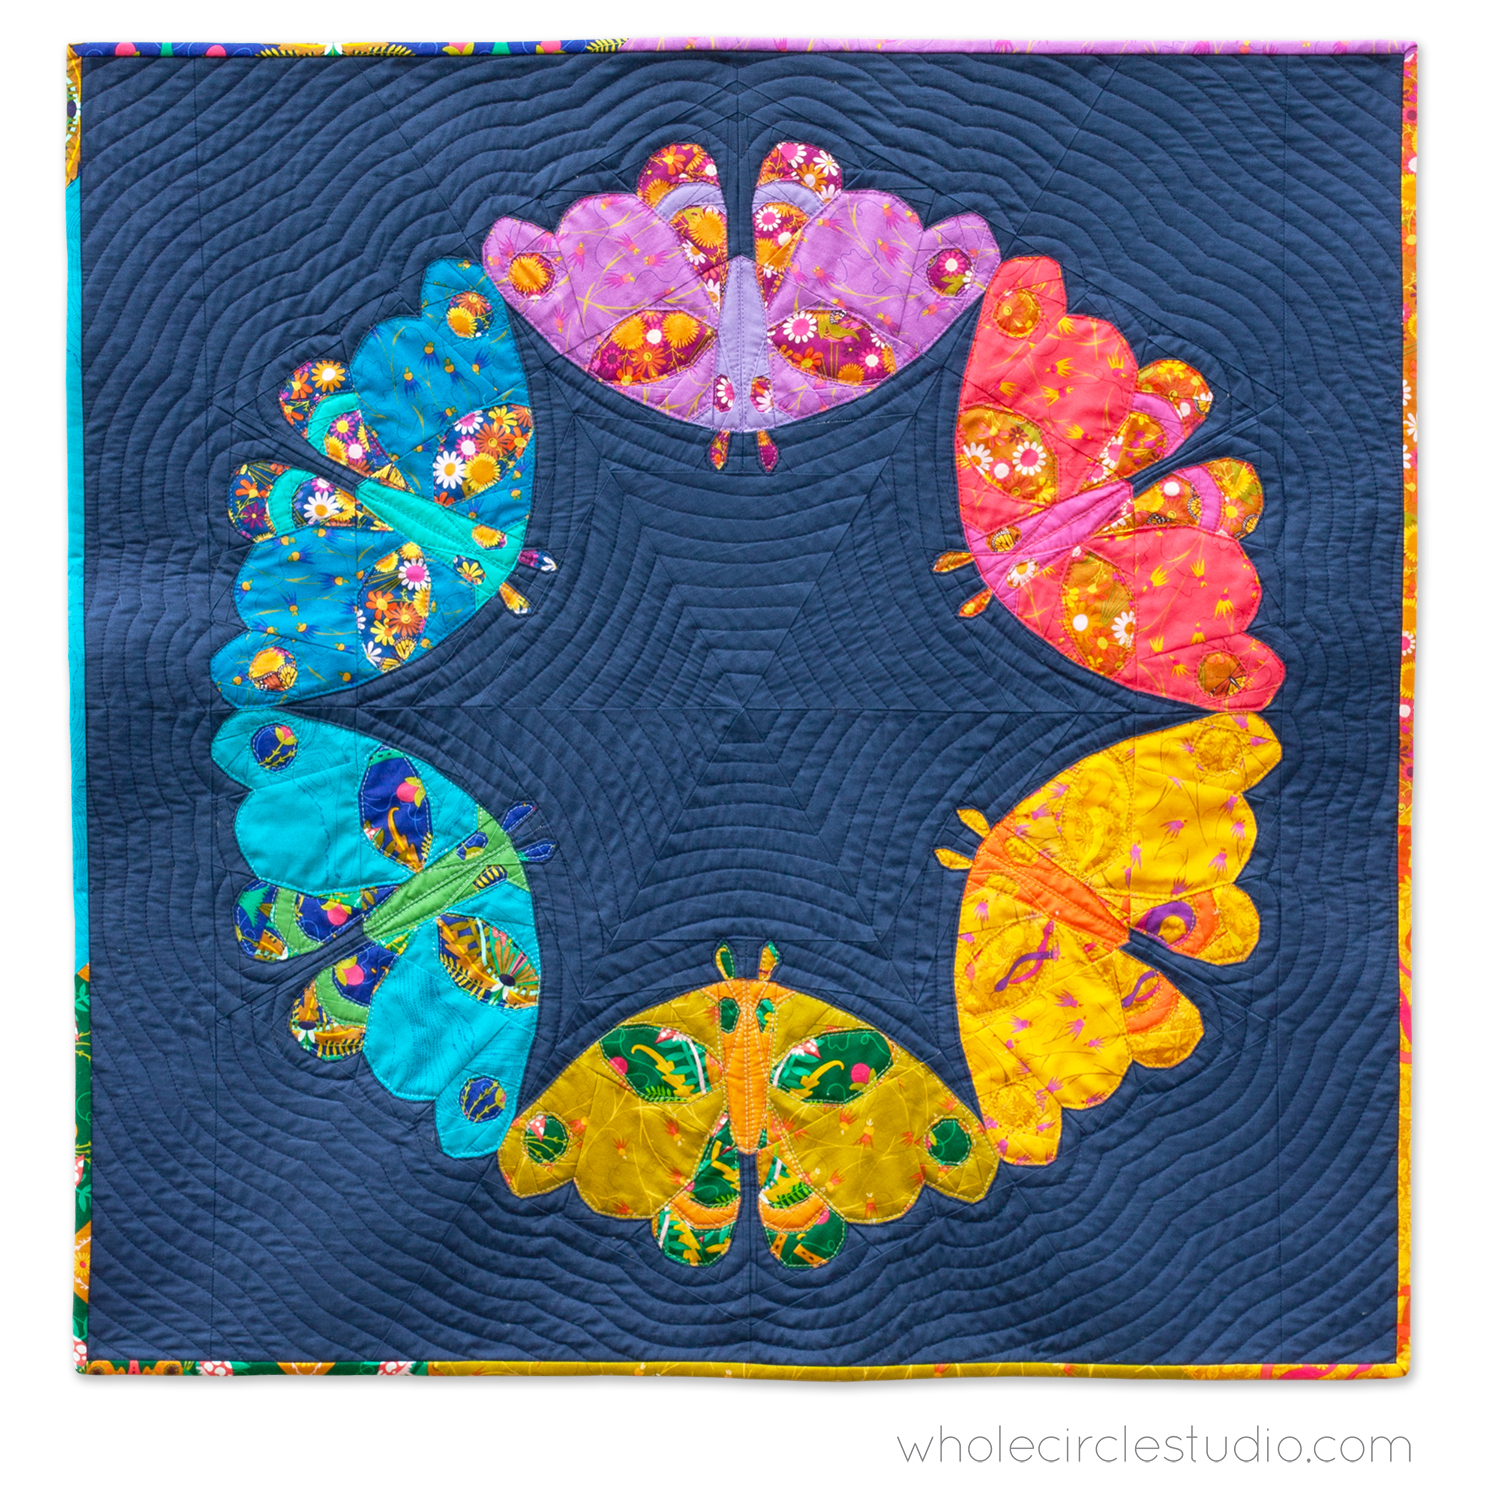
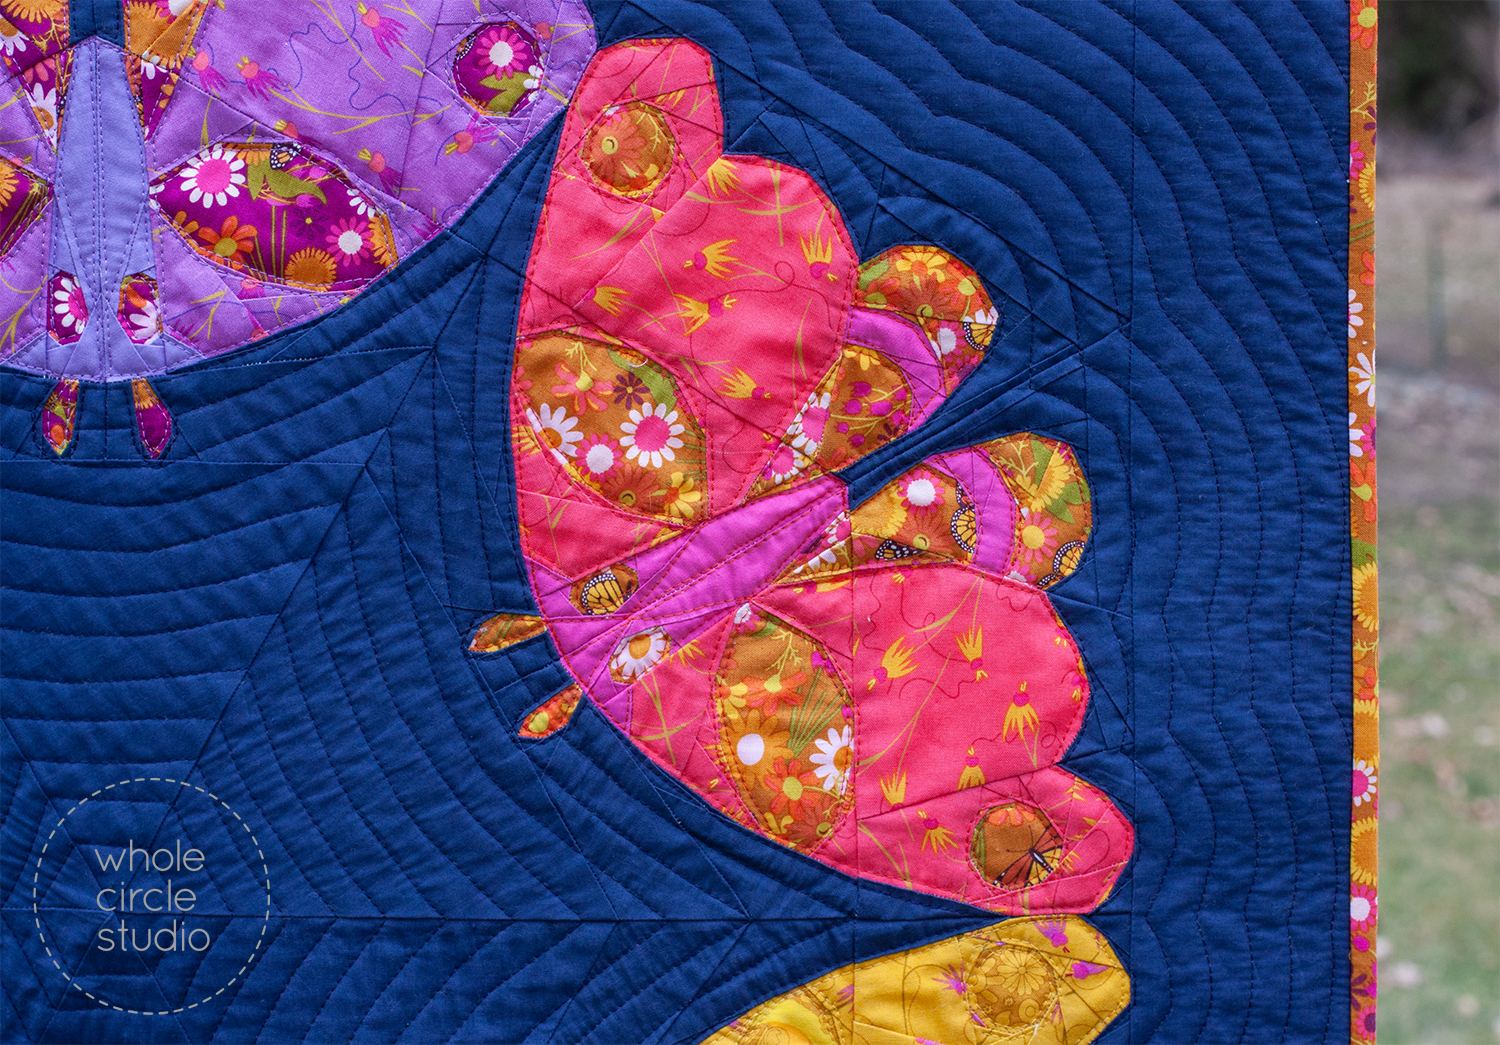
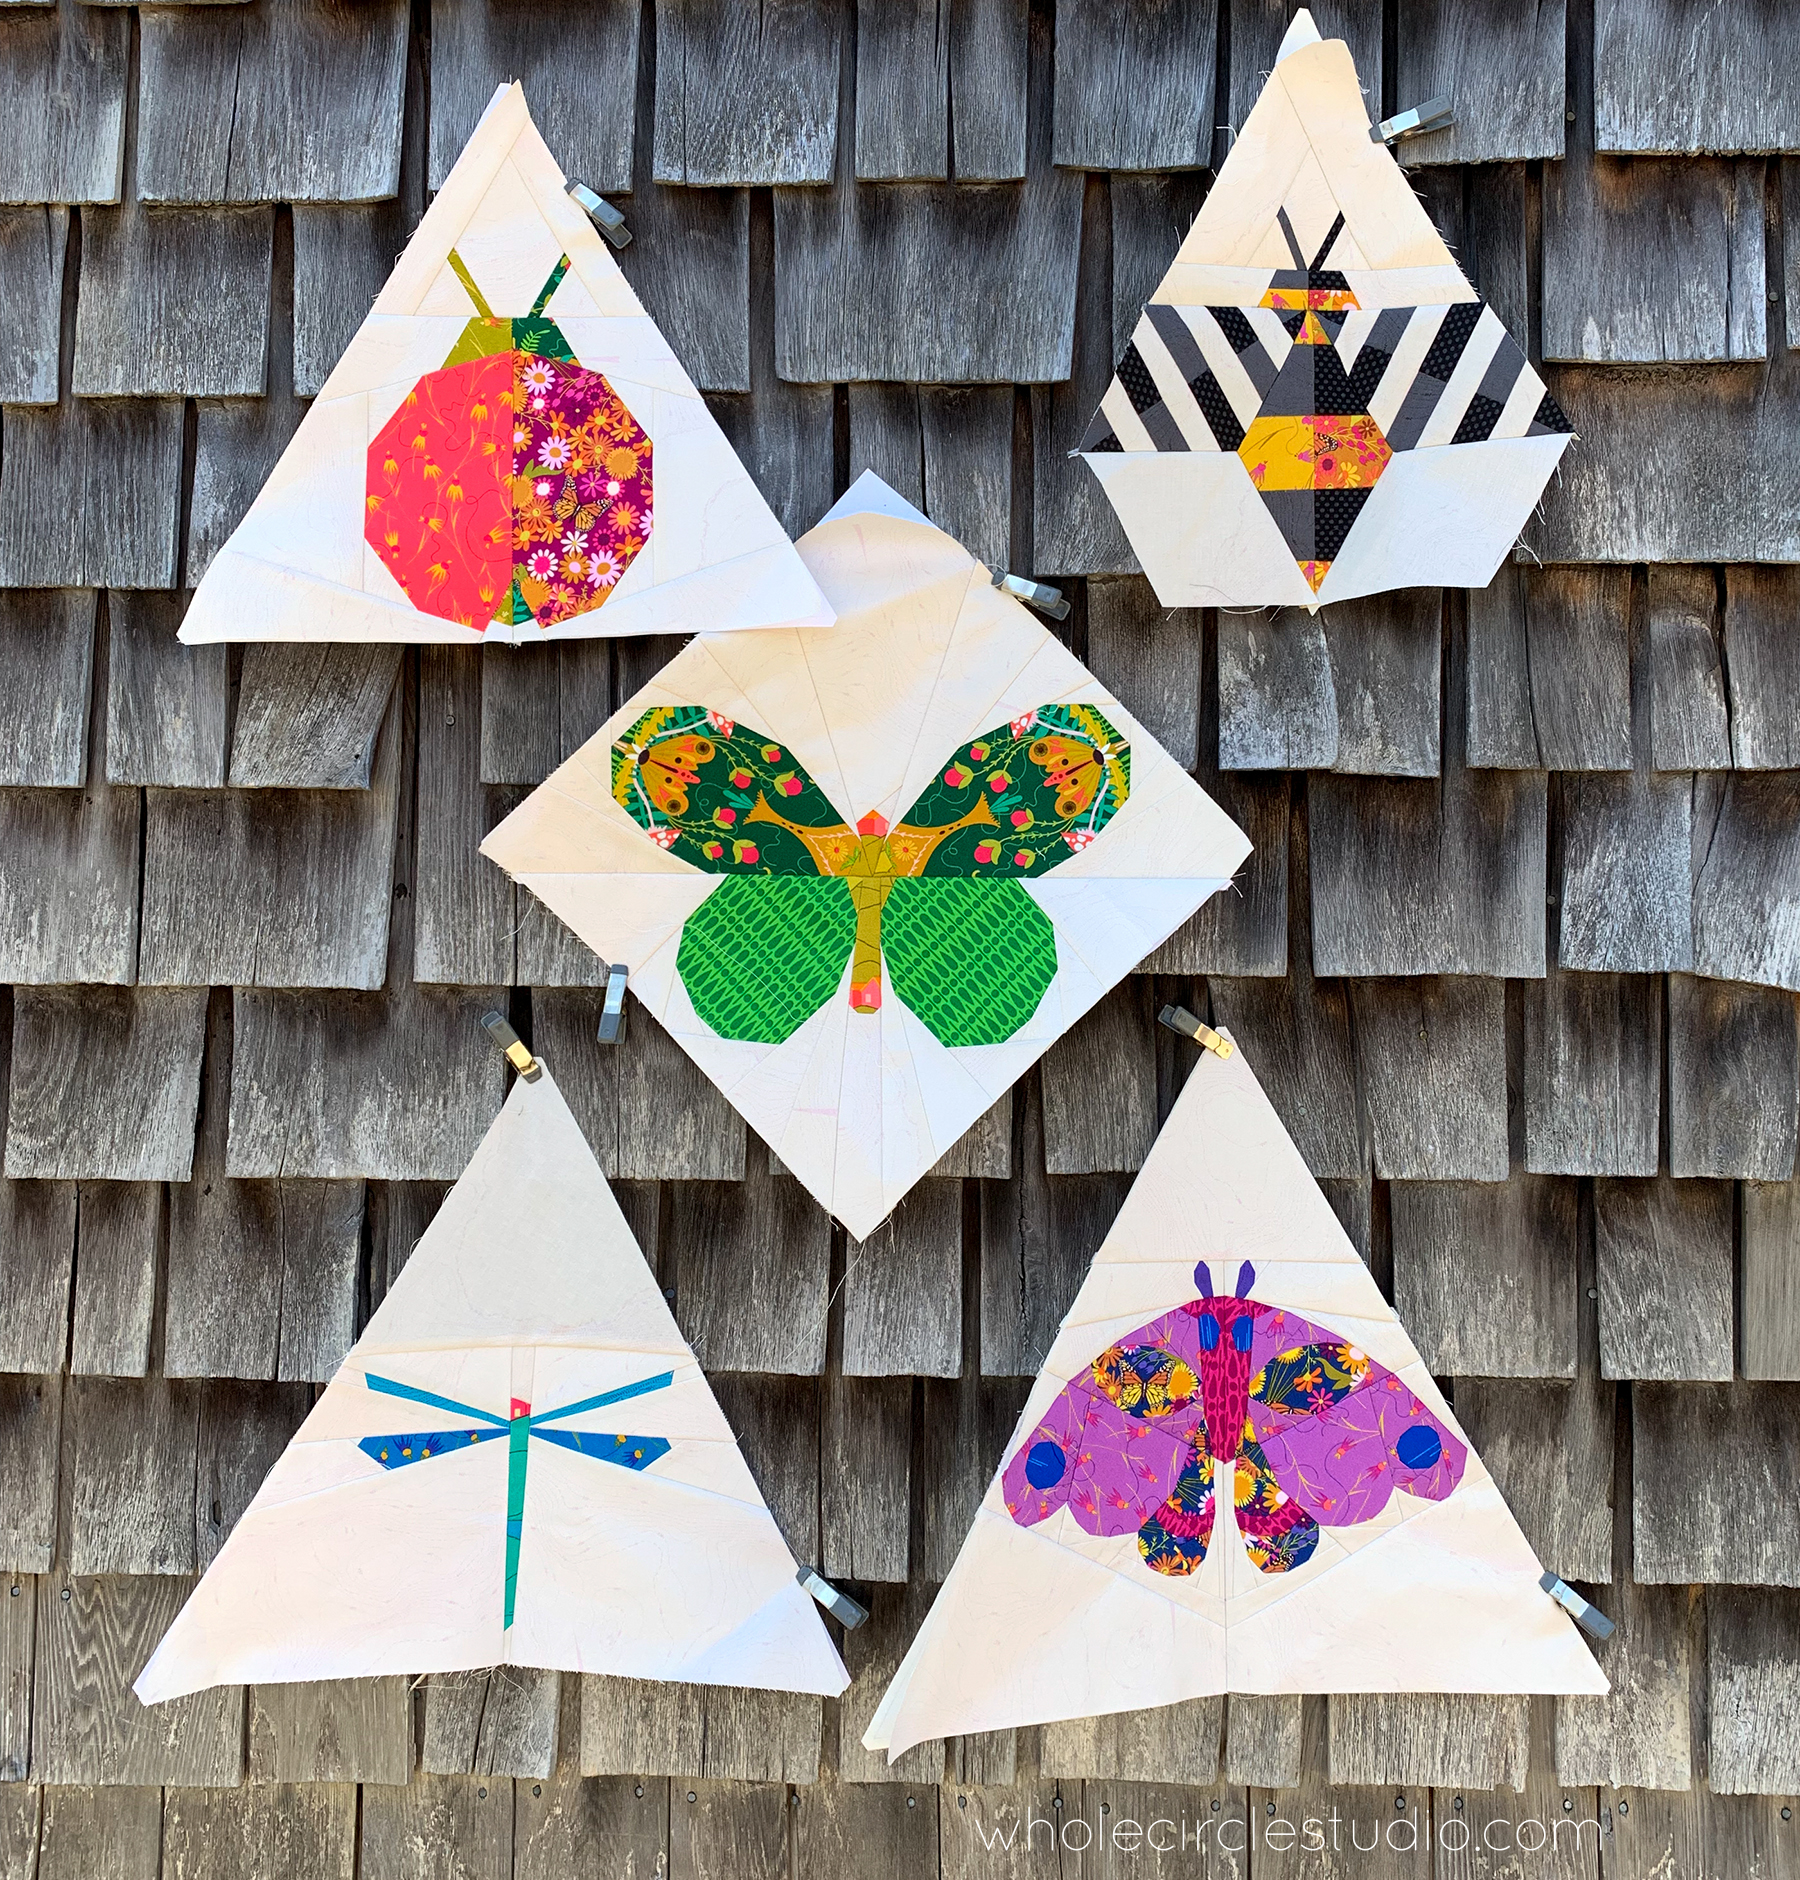
MODERN MOTHS is one of five quilt patterns in my Irresistible Insect series and is entirely foundation paper pieced. Using FPP, I was able to achieve some beautiful details and create a secondary star design in the negative space.
Let’s get started!
Here are my top 5 tips for a smooth and enjoyable FPP experience:

1. Choose the right thread weight and color:
Using a good quality thread is essential for foundation paper piecing. I use Aurifil 50wt thread for all of my foundation paper piecing. This 2 ply thread is thin and helps alleviate bulk in my seams, which is critical since you often have seams close to one another and overlapping in FPP. I like to use a neutral color or a thread that matches my fabric for a seamless look. The 50wt thread is also strong, ensuring that my stitches won’t come apart when I need to remove the paper after I’ve pieced my blocks.
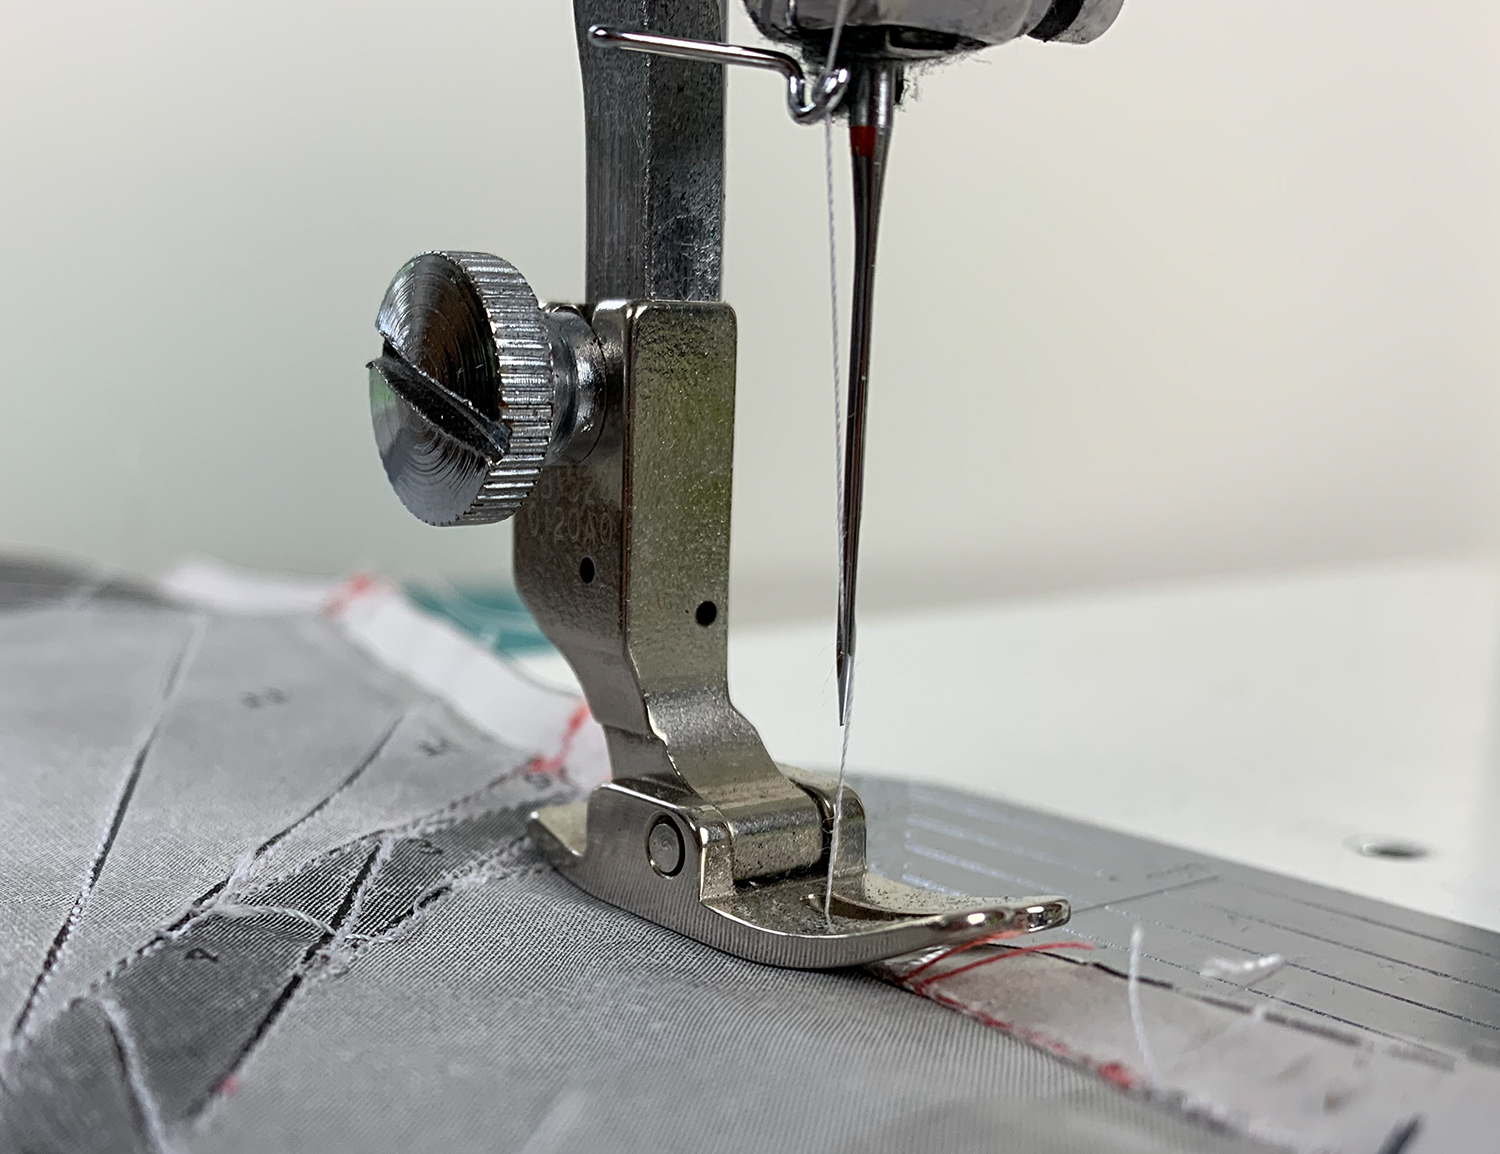
2. Start with a fresh needle in your machine:
Begin your FPP project with a new, sharp needle in your sewing machine. By doing so, you’ll achieve cleaner and more precise stitches as you pierce both the fabric and paper. I prefer to use a 80/12 Universal or Microtex needle. I find that this size works well with 50wt thread and perforates the paper nicely.
Sewing through paper dulls needles, so it’s important to replace your needle after you complete your paper piecing and before you move on to another project or quilting. Using worn down needles can result in poor stitch quality and worse, can do damage to our beloved sewing machines.
3. Choose an appropriate stitch length:
When foundation paper piecing, it’s best to use a short stitch length. I typically set my machine to a 1.5 stitch length, as it provides secure piecing and also perforates the paper, making it easier to remove once you’ve completed your block. If I’m foundation paper piecing tiny sections, I reduce the stitch length further to 1.3 or even 1.2. The shorter stitches help with precise starting and stopping points for sections with short lines.
4. Sew slowly:
Going slow is the key to accurate piecing, otherwise it’s easy to get carried away with our stitches and not stitch straight or go beyond where we want to stitch. If your machine has a stitch speed setting, be sure to set it closer to “slow turtle” mode rather than “fast bunny” mode. If you aren’t able to set your speed, just remember to not put the pedal to the metal.
Even though my stitch length is short with paper piecing, I like to backstitch or stitch in place (if your machine has that feature) at the beginning and end of my lines to make sure my stitches are secure, especially when I tug to remove the paper later. By using a 50wt, 2 ply Aurifil, I haven’t found that these extra stitches add any significant bulk and my seams still press flat.
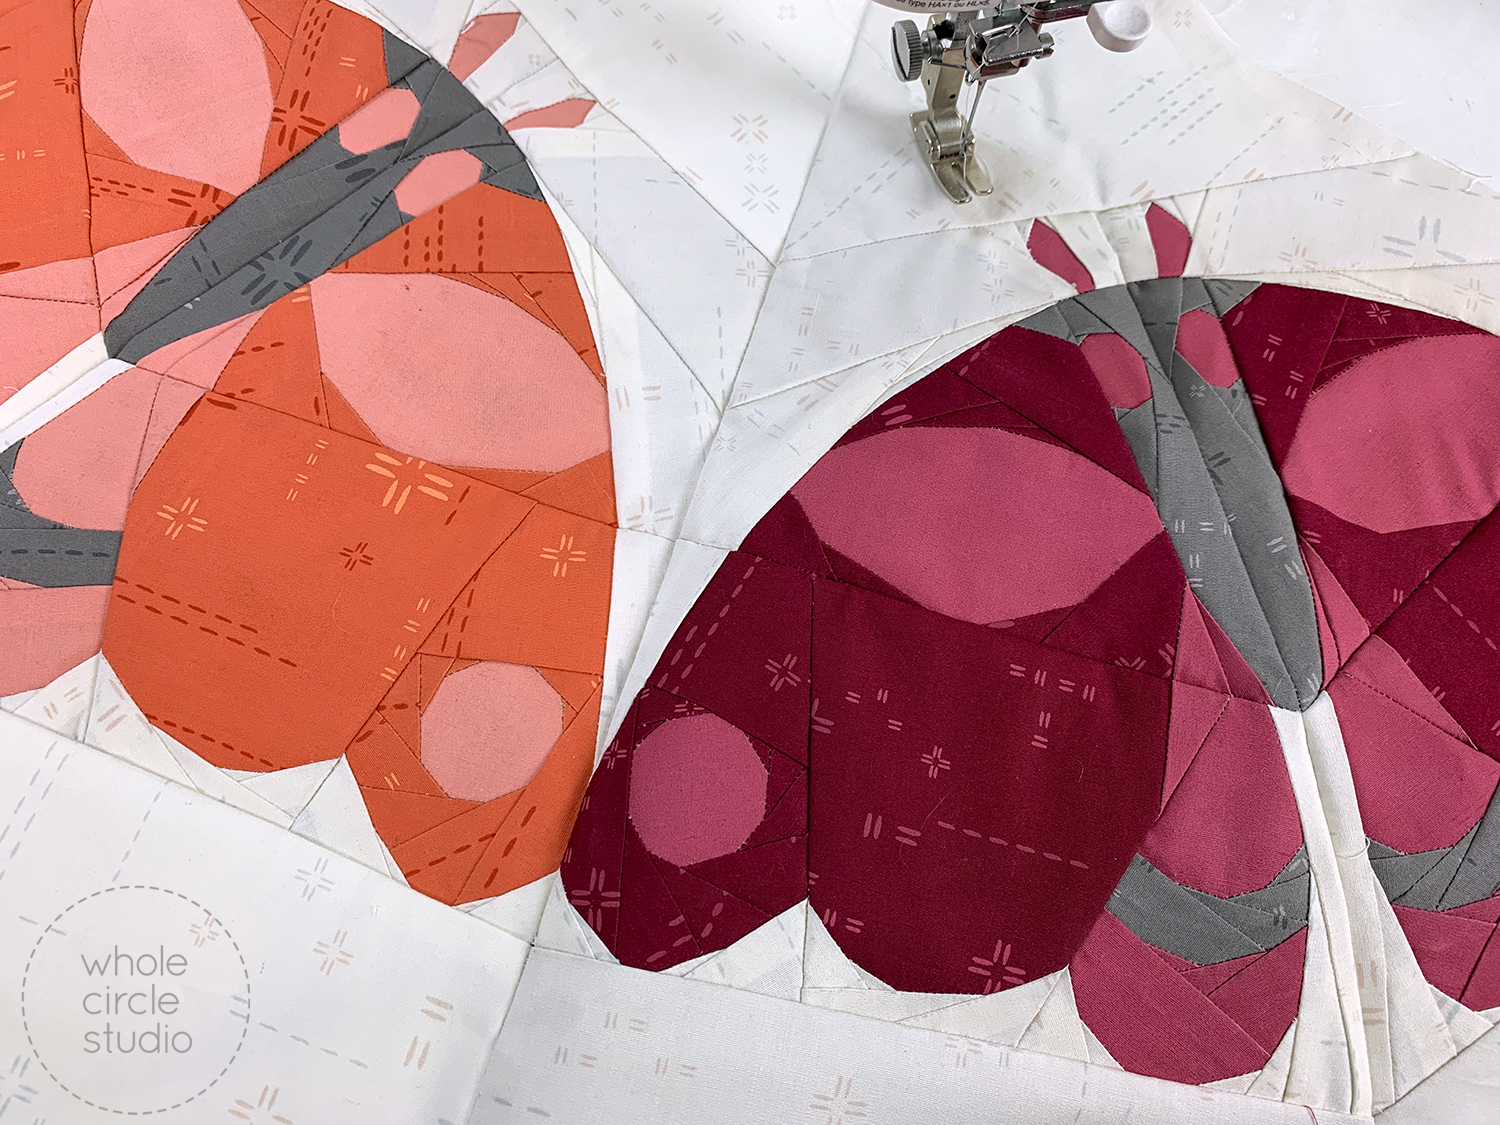
5. Optimize visibility on your machine:
Good visibility is important with all piecing, including foundation paper piecing. The better you can see the lines you’re sewing on, the more accurate you’re going to be with your piecing. Check out your sewing machine manual and the foot options available for your machine and experiement with the feet options on your sewing machine to see what is most comfortable for you. It’s important to have a clear view around the needle when the presser foot is in the down position, allowing you to sew accurately on the lines.
I hope these tips help you with your foundation paper piecing projects. Remember to select an appropriate thread and stitch length, change your needle frequently, sew slowly, and look into the presser foot options for your machine.
Keeping these suggestions in mind, you’ll achieve accurate quilt blocks with ease.
Are you new to FPP or do you find it challenging?
I find that with a little bit of patience and practice, quilters can pick up on it and learn to love this technique. Be sure to check out my free Foundation Paper Piecing (FPP) video tutorial/mini-class.
Happy piecing!

2 Comments
Hi there Sheri! I am working on my first FPP project — your Modern Moths. To begin with I thought, “YIKES! I’ve bit off more than I can chew.” But then I forged ahead and have found that I LOVE FPP and your pattern. Thanks so much for your YouTube instruction videos and your excellent instructions. I plan to do BZZZZ next, then ….who knows!
Hi Sheri,
I love your tips in your you tube videos. They Re extremely helpful and i can watch them any tune day ie night. Thank you for taking the time to provide them. I have several of your patterns. One finished one in progress and Bzzz i have the fabric pulled. I will share pictures as I finish as i have in the past.
Patty B.
Ps the templates I purchased for
The class that I took with you were a godsend! It was fun being there with my best Bud Sharon.