
(this is the 3rd post in a series about exhibiting at my first Quilt Market. Be sure to read the first and second posts.)
September 2016 was all about honing in on design details for my booth, finalizing new patterns for launch, making new connections and organizing details and production schedules for my Market debut.
There were lots of things to consider while trying to determine my final booth design:
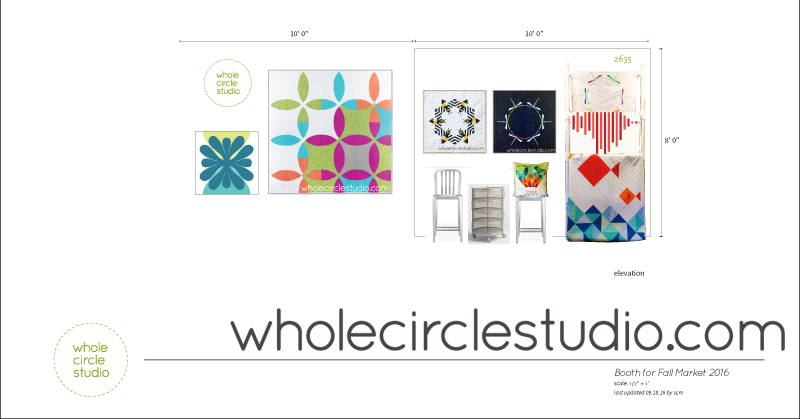
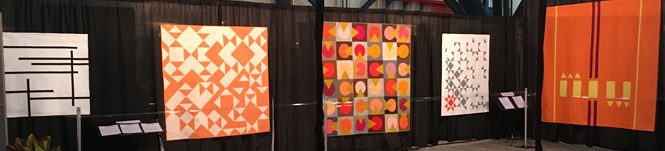
– I had a corner booth, which was great for exposure and traffic flow, but it meant I had only 2 walls to display quilts on. I decided that I wanted a quilt ladder so that I could display more quilts. I also featured smaller quilts as pillows that could sit on stools. This freed up valuable wall space and made the booth cozier.
– I wanted furniture and fixtures that could be functional but not distract from my quilts. Shipping was also an issue. I live 1,700 miles from Houston and had to ship anything I was planning on bringing. I did consider, for a minute, driving. In the end, very generous friends who live in Texas (and have good taste in furniture) were nice enough to loan me the table and chairs and drive them 3 hours to Houston. My husband and I designed the quilt ladder so that we could disassemble it and pack it fairly compactly. Some items were actually cheaper to purchase in Houston and then give away at the end of the weekend than they were to buy in Connecticut and ship. More to come on shipping logistics in the next blog post about October preparations. I didn’t have shipping totally figured out until the beginning of October, but knew that I had to consider it when planning the final booth design and to keep things moving along.
– I needed to decide what to do about walls and flooring. When you rent a booth at Market (and most trade shows) you’re physically renting just the space. While there was pipe and drape separating the booths, you aren’t allowed to hang anything off that pipe. Also, the drapes are not opaque and you never know what the backside of the booths next to you will look like—it can be unpredictable what will be showing through. Most exhibitors elect to essentially build a booth within the booth footprint The options I was exploring were:
- Rent additional pipe from the convention center vendor and hanging drapes that I purchased online. They had to be fireproofed (per convention center rules). I could have rented the drapes as well, but financially it made more sense to purchase. (Big sigh—another thing to ship!)
- Build my own walls. If I didn’t drive, Jason and I would have purchase all of the materials in Houston and build them in place. It would be too expensive to ship.
I really loved the idea of having physical walls, but in the end, I went with the drapes.
Flooring was another big factor. If I chose to do nothing, I would essentially have a concrete floor. Aestetically, I wasn’t against this but you never know the condition of the section you’re located in. Plus, standing three long days on concrete sounded exhausting for me, and my booth visitors. Again, I could rent carpet at a steep price (that then usually gets thrown out after the show—not very eco-friendly) or could purchase my own option. I considered fun carpet squares but in the end used a foam flooring that looked like wood (purchased through Amazon!). I heard good things about the foam—it was fairly durable and was comfortable.
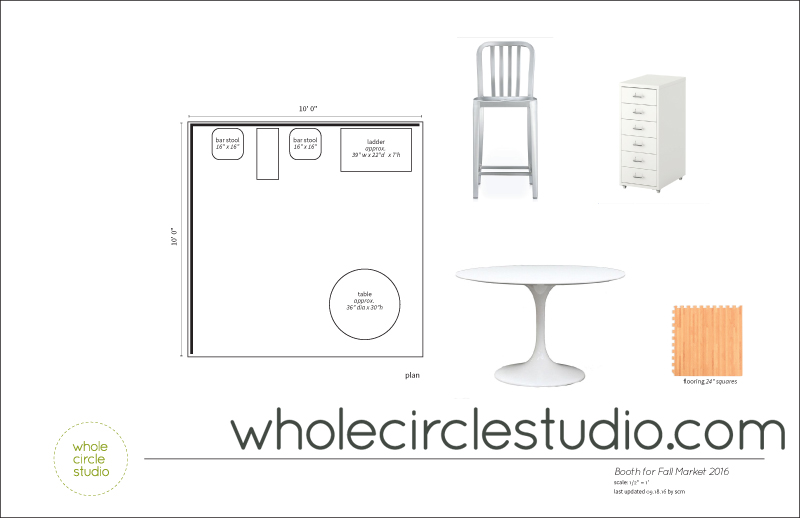
Once these decisions were made, I was able to finalize the plan and elevations for the booth. I created them using Adobe Illustrator and SketchUp. Since I didn’t have the space in my studio or house to set up the actual booth and I wasn’t going to have all of the furnishings until I got to Houston, these drawings and renderings were critical to make sure I could totally envision the booth design. The documents assured me that everything would fit.
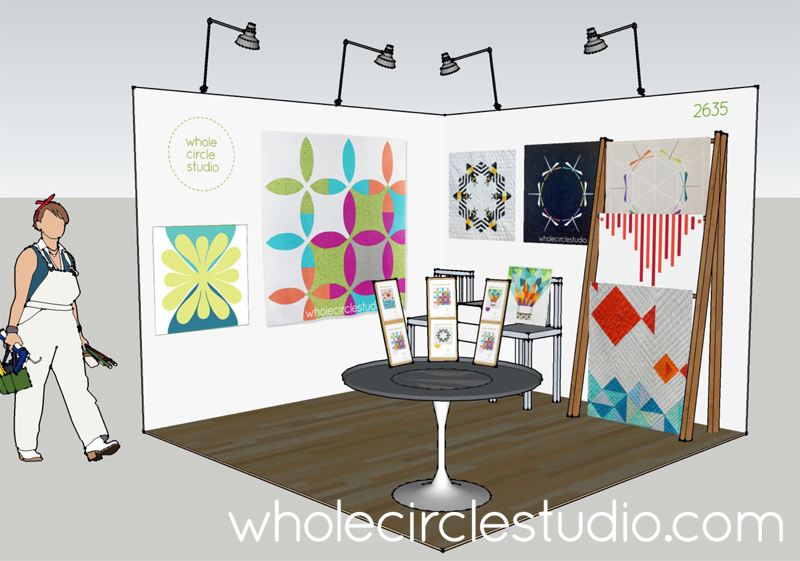
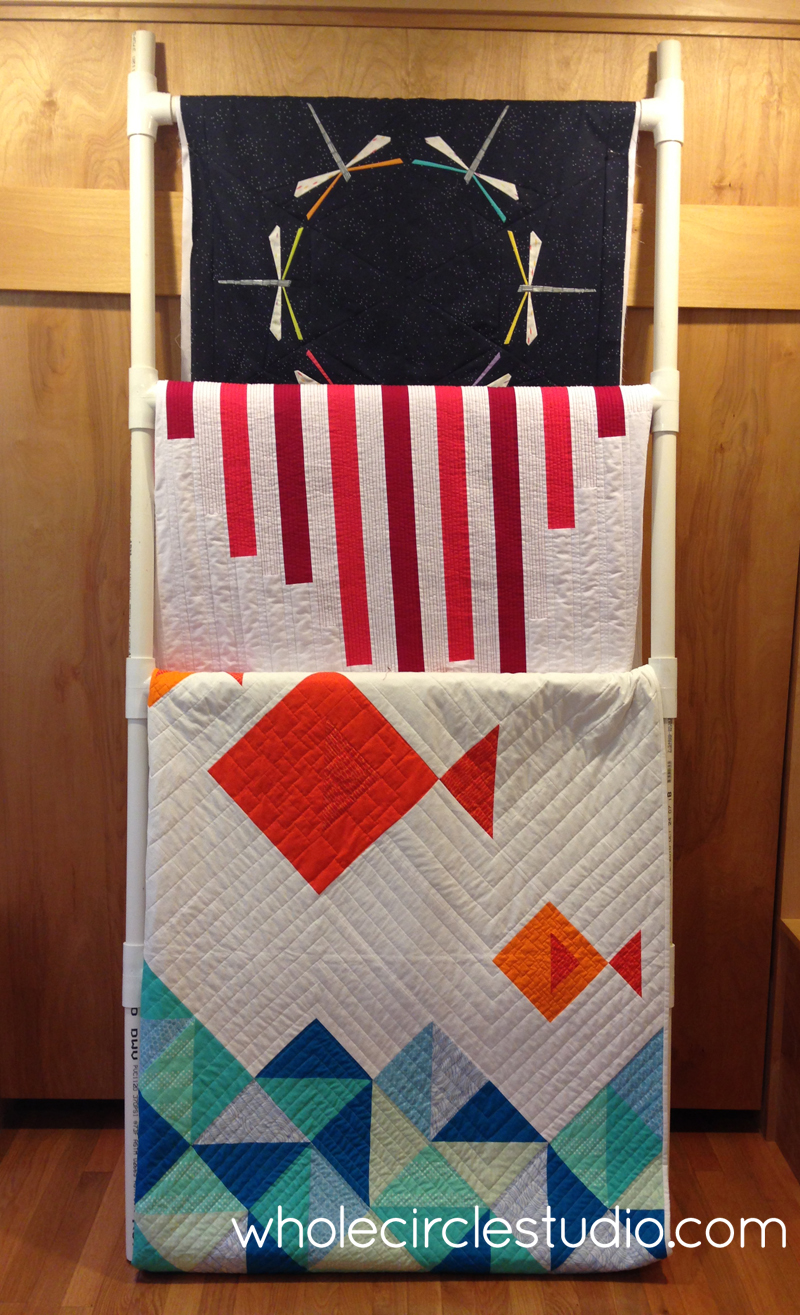
Jason and I also finished the design of the quilt ladder. This included building a mockup out of inexpensive materials (pvc pipe that we had leftover from another project). By making the mockup, we were able to make sure that measurements were what I needed them to be in order to accommodate my quilts before investing time and materials to build the final ladder.
There were also a lot of details to tend to in September:
- Flights, accommodations and large rental cars (big enough to move all of the booth furnishings) were booked.
- Paperwork for Market badges and renting electrical for the booth was filed.
- I started working on the design and messaging on my sell sheets, order forms and other collateral.
- I reached out to potential distributors who might be interested in my patterns. By the end of the month, I had orders from three of them. This was especially helpful as I could list them on my sell sheets that I distributed in the booth.
- I was making the final edits on new patterns so that they could be ready to print in October.
- I kept organized with tracking all of my tasks (small, medium and large) weekly using Excel spreadsheets. Everything was prioritized. These lists kept me on track.
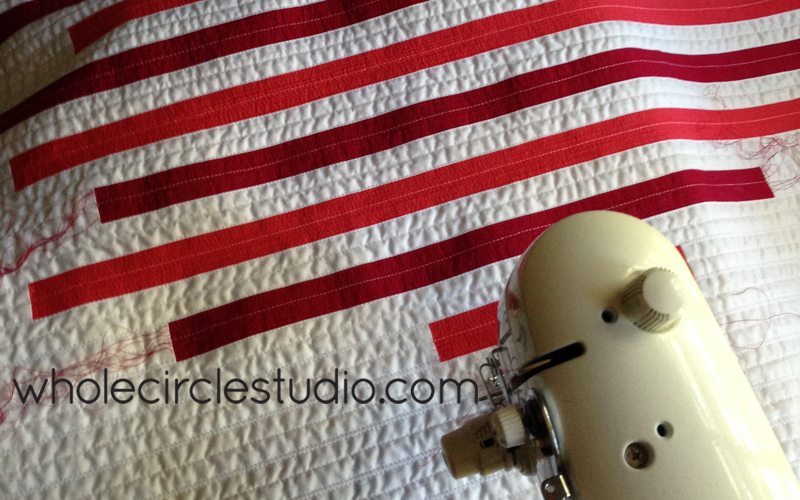
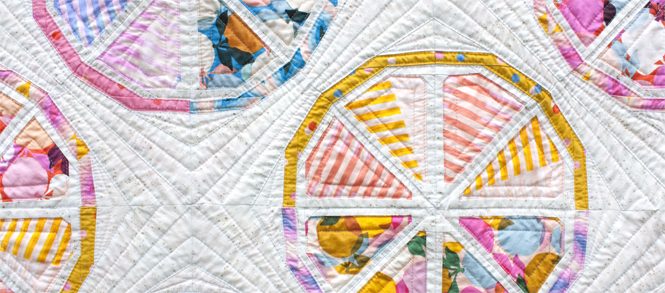
Oh, lastly there was sewing and quilting going on! Going into September there were quilts that I needed for the booth that were in progress or weren’t even started yet.
September was a flurry of activity. In my next post, I’ll be describing the storm of activity that happened in October as everything came together.
(If you haven’t already, be sure to read the first and second posts in this series.)

1 Comment