Have you ever wanted to add something a little extra to your quilt blocks? I recently started experimenting with embroidery and I LOVE it! It’s an easy way to add custom details to your work. Today, I wanted to share some embroidery tips and inspire you to give it a try.
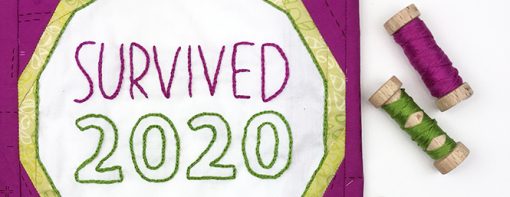
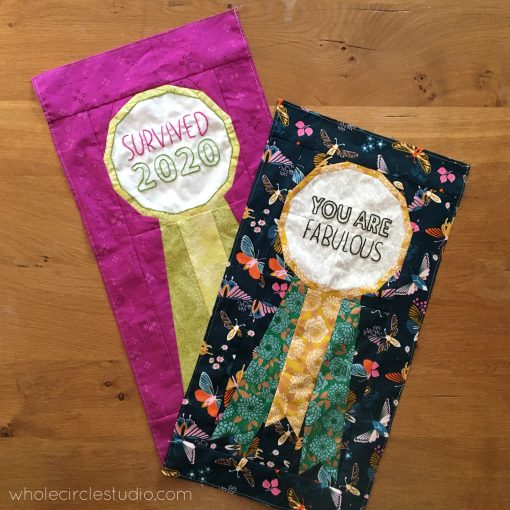
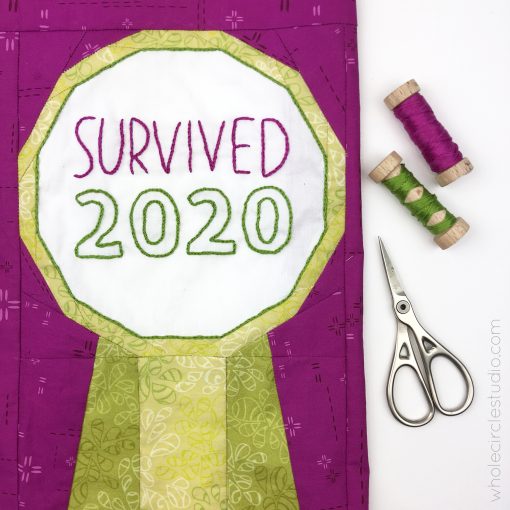
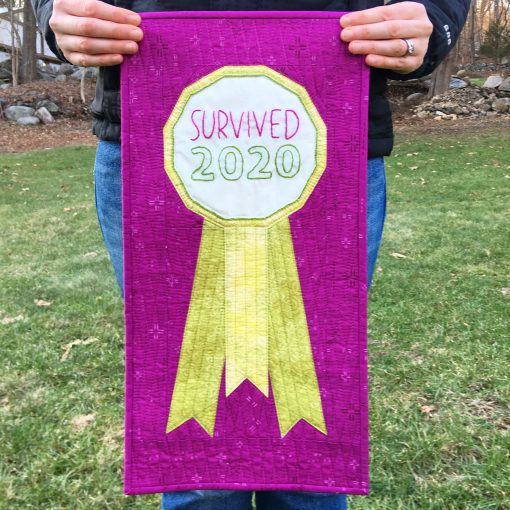
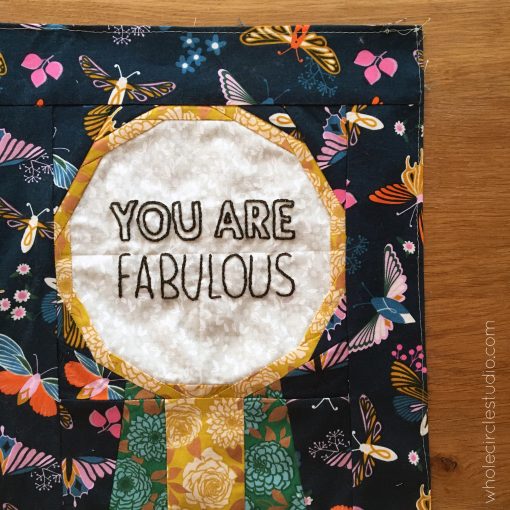
Here are some Best in Show quilt blocks that I added embroidery to:
After piecing Best in Show blocks, I embroidered my messages before making my quilt sandwich and quilting.
Want to get started with embroidery?
Gather up some basic supplies!
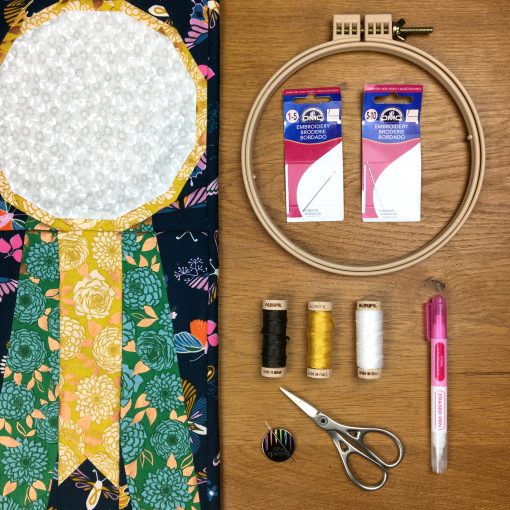
1. Quilt block or fabric to embroider
2. Embroidery Hoop
An embroidery hoops makes your fabric nice and smooth, helping you keep your stitches even and consistent. Hoop sizes range from small (3″ in diameter) to large (12″ in diameter). I find a medium size, measuring 7″ works best for me. I tried a number of hoops, including inexpensive wood and a quilting hoop. I had challenges with both, as my fabric kept slipping and wouldn’t stay taut in the frame. For this reason, I really like the Morgan Hoop that has an interlocking tongue and groove.
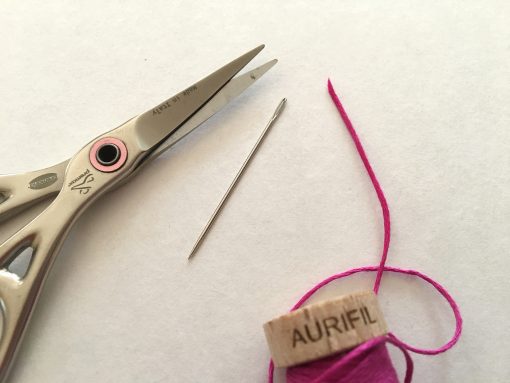
3. Embroidery Hand Needles
I find I have am a bit more accurate with my stitching if I use a thinner embroidery needle. The higher the number, the thinner the needle (but that also means the smaller the eye to thread your floss/thread). If you’re new to embroidery, I recommend picking up a DMC Embroidery Hand Needles variety pack of sizes 1-5. After some practice, you may want to also give thinner hand needles a try. Getting a pack that has sizes 5-10 is a great way to experiment.
4. Cotton Floss (six-strand)
When working on cross stitch as a kid, I remember mini skeins of floss getting all tangled and knotted as soon as I took the tiny paper tubes off. Gone are those days! I love and use Aurifil cotton floss. It comes on a beautiful wooden spool—awesome for traveling and pretty to look at.
5. Marking Tool
If you don’t want to freeform your embroidery design, you’ll want to draw or trace it on your fabric before you start. I like Clover Air Erasable Pens. If you use these, you’ll have to work pretty quick or trace your design in sections. The marks fade over time, about 1-8 days. If I want my drawing to last a bit longer, I use a Clover Water Soluble Pen. Marks made with this pen typically come out with a little bit of water. With any marking tool that you use, it’s always best to test to make sure the marker doesn’t have an adverse reaction to the fabric you’re using.
6. Small Scissors
7. A Safe Place to Store Your Needle
When you’re not using your sewing needles, have a needle minder hold them for you! Be sure to check out my cute (and strong) Sew Speedy needle minder.
Get started!
KEEP IT TIDY!
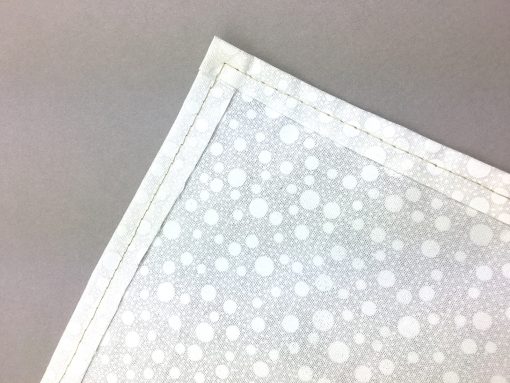
I temporarily hem the raw edges of my block to avoid fraying while embroidering. It’s easy and it keeps edges neat and tidy. Press your raw edges about ¼” – ½” under and then secure with a long stitch on your sewing machine. When you’re done with your embroidery, you can remove these long basting stitches and press the hem open or simply trim the hem.
Trace it out.

I test out and audition what I want to embroider on my computer. Once I’m happy with my design, I’ll print it out.
Want to embroider “SURVIVED 2020” or “YOU ARE FABULOUS” on your Best in Show block?
Download the text as a PDF here.
Here’s a tip: I fold both my printout as well as the area in my fabric I want to embroider in half both horizontally and vertically. I can then use those fold lines as guides to align my printout and fabric before I trace my design on to my fabric. The creases will eventually work their way out.
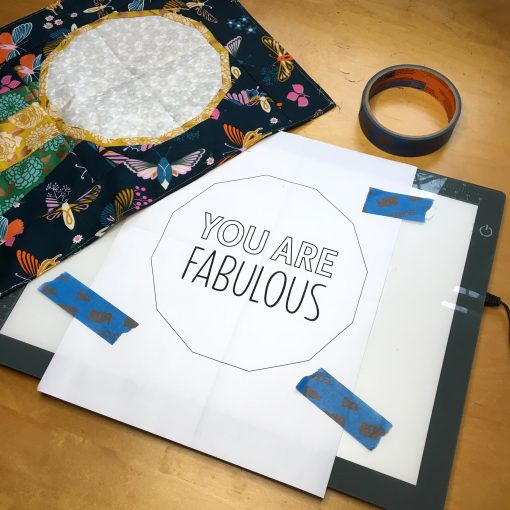
I use Painter’s Tape to first secure my printout to my lightbox. I love my Daylight Wafer 1 Lightbox. It’s slim and gives off great natural light—I actually use it for all sort of things other than tracing (like extra light when I’m photographing or even lighing up a room for a Zoom call!). If you don’t have a lightbox, you can also tape your printout to a window.
Once the printout is secure, I then position my fabric (using my horizontal and vertical fold lines). Once the alignment is set, I’ll tape my fabric down on top and then begin tracing.
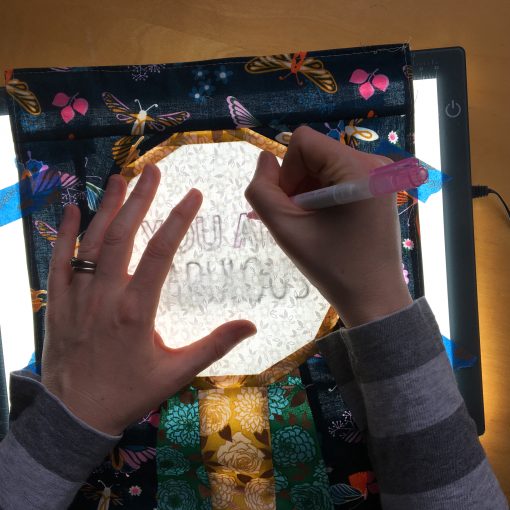

Clover Air Erasable Pens are great for tracing since the marks fade on their own (anywhere from 1-8 days). If I’m taking my time with the embroidery process, I’ll sometimes have to go back and touch up some of my lines.
Let’s stitch!
First step—get your needle threaded with your floss. I like big chunky stitches, so I use all 6 strands of my floss. If you’d like a thinner, more delicate line weight with your embroidery, you can separate the strands and use less.
Here are some tips for working with floss:
• Cut your floss about 12″ – 18″ in length, about the length from the tip of your fingers to the inside of your elbow. If you cut your floss longer, it’s more likely to knot when you’re stitching. Longer floss lengths also mean a lot more work! Remember, you need to pull the full length of the floss through every stitch.
• Threading all 6 strands of floss through a needle eye can be tricky. I find cutting the end of the floss at a 45 degree angle (see photo below) and then wetting it with my tongue or fingers makes it a bit easier to get the floss through the needle eye.
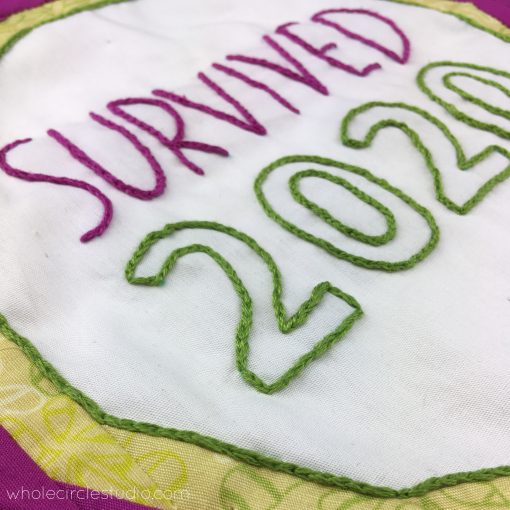
My preferred stitch is a Split Back Stitch (shown above).
I find that with some practice, I can be precise with this stitch and I love the way it looks. Check out the videos below and stitch along with me!
Are you ready to end your floss? Check out how I do it:
This is what my embroidery looks like from the back—nice and tidy!
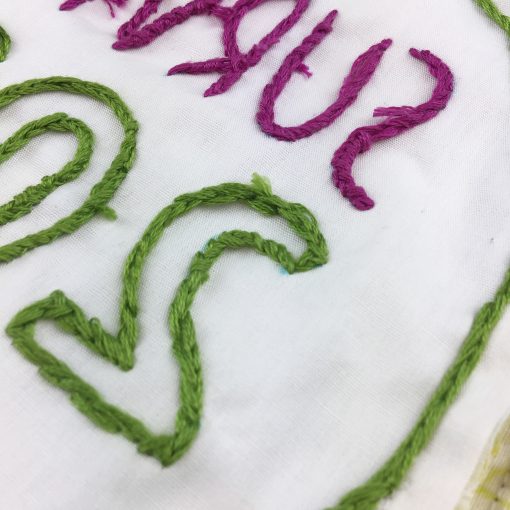
This is just one type of embroidery stitch. There are lots of different styles of stitches that allow for a variety of effects.
Give it a try!
I hope you’re inspired to incorporate embroidery into your quilt blocks! The Best in Show quilt block is the perfect project to experiment with incorporating embroidery. It also makes a great custom gift.
Get your copy of the pattern here and start today!