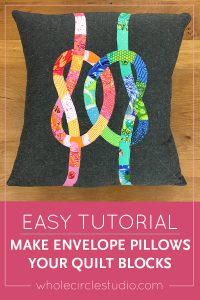
Do you have an abundance of random quilt blocks or mini quilts that are sitting in a pile and you don’t know what to do with them? I have an idea for you—turn them into simple to make pillows! In this tutorial, I’ll show you an easy way (no zipper needed) to make a decorative pillow from a quilted block.
I love making pillows with a simple overlapping, envelope backing. You can easily remove a pillow form or other stuffing and wash the pillow cover when needed. These pillows make great gifts to give or keep for yourself.
Most everything is cuter when it’s small and in my opinion that includes pillows too! While there are standard pillow form sizes, I don’t let those parameters limit what I make. While perhaps not functional, mini pillows are super cute and can add a nice detail to your home decor or knickknack shelf. At the end of this tutorial I’ll let you in on a little secret as to how I stuff my pillows if I can’t find a pillow form that fits the pillow I made.
GATHER YOUR SUPPLIES:
• Quilt block quilted or unquilted (I prefer quilted)
• Fabric for back of pillow — see below for how much fabric is required based on your quilt block size
• Sewing Machine (I use a Janome 6700p)
• Iron (I use an Oliso Mini Pro Iron)
• Acrylic ruler (I use a Quilter’s Select Acrylic Ruler)
• Rotary Cutter (I use an Olfa Rotary Cutter)
• Thread (I use Aurifil 50wt Cotton)
• Pins (I use Iris Superfine Pins)
• Fabric Marking Pen or Pencil (I use a Sewline Fabric Pencil or a Clover Water Soluble Pen)
• Sharp pair of fabric scissors (I use Karen Kay Buckley’s 6″ Scissors)
IDEAS FOR PILLOW BLOCKS:
If you’re looking for a quilt block or mini quilt that makes a great pillow, check these out:
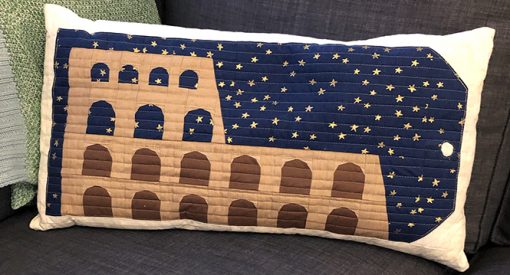
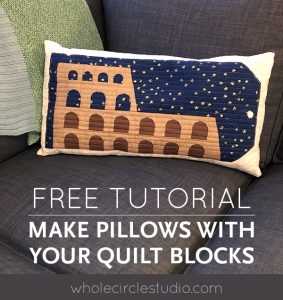
• Around the World Blocks: I used one of these blocks for this tutorial. Pattern makes blocks that celebrate architecture from around the world as well as inspires us to dream about travel, exploration, and the opportunity to see new places. Makes 10″ x 21″ blocks—perfect for decorative pillows!
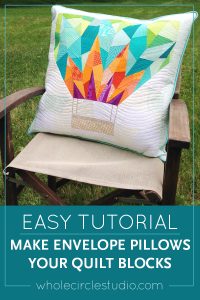
• Up and Away mini quilt: Adorable hot air balloon. Mini quilt finishes at 18″ x 18″. If you want a larger pillow, you can add a border to the quilt top!
• Typecast Fast Quilt blocks: The pattern includes the entire English alphabet, all the numbers and lots of punctuation. Make any letter, word or phrase you want into a pillow.
• Citrus Slices: Pattern makes either a 15″ or 20″ square block.
• Apple Turnover: Pattern makes a 10″ x 15.5″ block or 17″ x 34″ mini quilt.
• Paws Up!: A super cute dog & cat themed quilt pattern. Makes a 30″ square mini quilt.
• Patchwork Petals: A modern floral quilt pattern. Makes a 16″ square block.
Let’s get started!
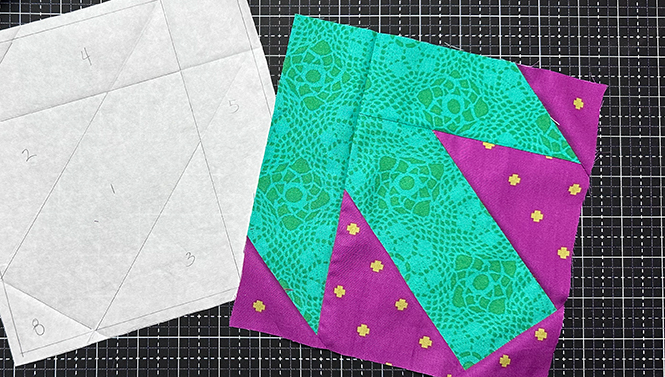
1. Prepare your quilt block top.
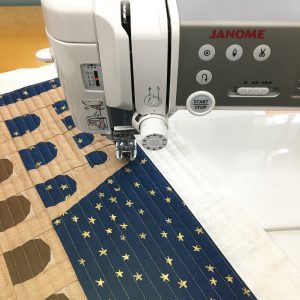
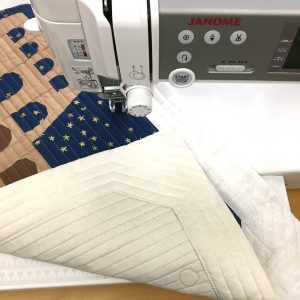
I love the texture that quilting adds to pillows. Using my Even Feed Foot on my Janome 6700p, I add horizontal lines. Since the back of the quilt will be inside a pillow and not seen unless the pillow form is taken out, I used inexpensive muslin when making my quilt sandwich. Before making the quilt sandwich and quilting, I added a border to my block so my finished pillow would be slightly bigger than the original block.
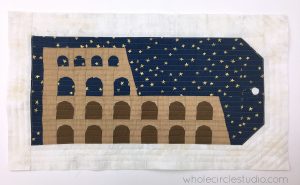
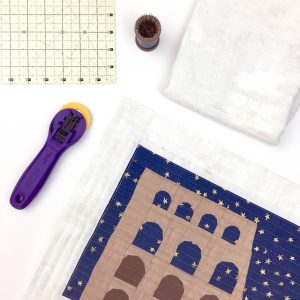
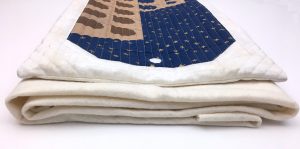
After you finishing quilting, trim and square up your quilt block. Make a note of the dimensions. My trimmed quilted block (shown above) measures 14″ x 25″.
2. Calculate and cut fabric for your pillow back.
First, decide if you want the overlap of the backing fabric to be horizontal or vertical.

Then, we need to do a little bit of easy math to determine what we need for our pillow back.
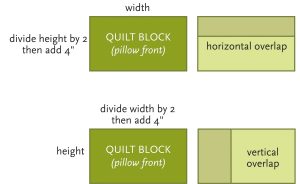
To figure out what size we need to cut our fabric pieces for the back of the pillow we need to:
> Measure the width and height of the pillow front.
> For the size you want the overlap to be (see diagrams above), take that measurement and …
> Divide this number by 2. Then add 4″.
> This measurement (along with the other side measurement) is the size you’ll cut your pillow back fabric.
> You’ll need to cut TWO pieces in that size.
Using this formula, here’s the math for the pillow I made.
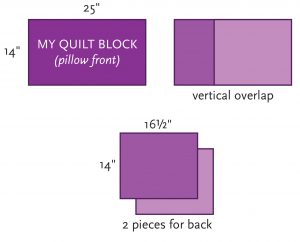
I wanted to have the overlap of the enclosure for the pillow back be vertical.
The width of my pillow front measures 25″.
25″ ÷ 2 = 12½”
12½” + 4″ = 16½”
I cut TWO fabric pieces measuring 16½” x 14″.
(14″ is the measurement of the other side of my pillow front.)
3. Whew… now the math is done, let’s get sewing!
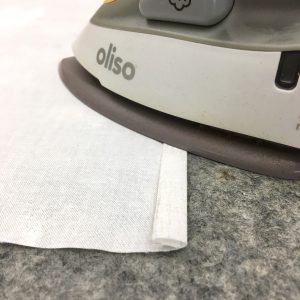
On the side that will OVERLAP (in my example for a vertical overlap it is the 14″ side), fold and press your fabric approximately ¼” under so that the wrong sides of the fabric are touching. Fold and press again, approximately ¼”
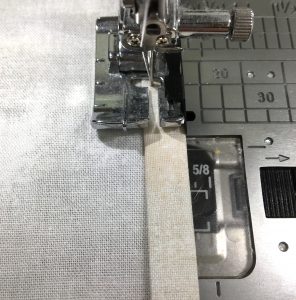
Secure by stitching the folds a scant ¼” from the edge (as close to the first fold as possible). Repeat for the second piece of backing fabric.
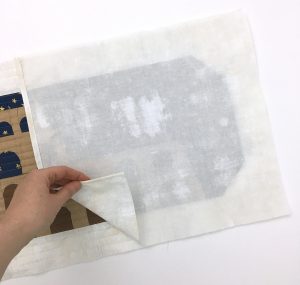
Arrange your quilt block with the correct side facing you. Place one of your pillow back fabric pieces, with the correct side of the fabric touching the quilt top. Make sure that the raw edges of your quilt block are aligned with the edges of the piece of fabric. The hem will be in the middle of your block. The wrong side of the pillow back fabric will be facing you.
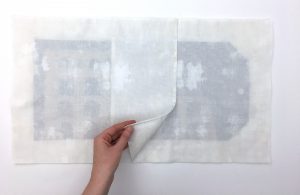
Layer the second piece of your pillow back fabric, correct side of the fabric touching the quilt top so that the remaining raw edges of the quilt top are aligned with the edges of your pillow back fabric. The wrong side of the pillow back fabric will be facing you . The two pillow back fabric pieces will be overlapping and the two hems will be in the middle.

Secure the layers by pinning around all of the edges of the pillow.
Sew around the perimeter, ½” away from the raw edges. I recommend backstitching, or stitching in place, when starting and stopping.
4. Finishing it up!
You’re almost done! Just one more step to make sure the corners are crisp…
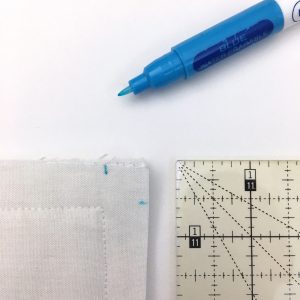
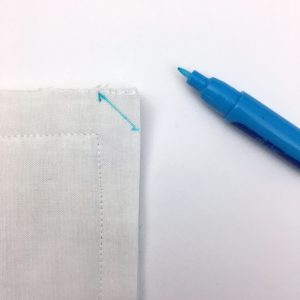
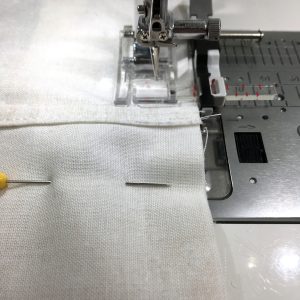
> Using a fabric pen or pencil, make a mark ½” away from the corner in both directions.
> Draw a line between both marks
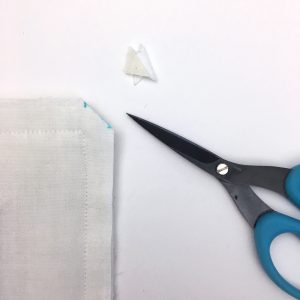
> Using a sharp pair of fabric scissors, trim on the line to clip the corners
> Repeat for the other 3 corners.
Trimming the corners will make them less bulky.
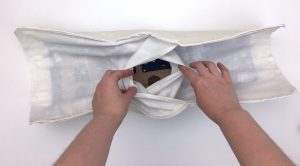
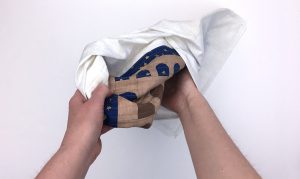
Reach inside and turn your pillow right side out! I like to use a Slim Hera Marker by Clover or That Purple Thang at the corners to get them nice and pointy.
5. Stuff it!
If you can find a pillow form that fits your new pillow, go for it! The pillow I made was a bit of an off size. I could have made a pillow form and used Fiber Fill or something like it. My pillow is going to be purely decorative and not functional, so it doesn’t need to be fluffy.
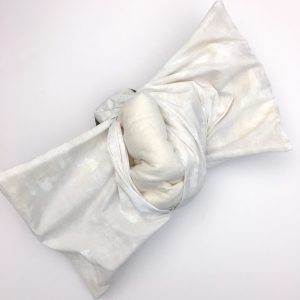
I have LOTS of leftover batting scraps in my Studio, so I folded and layered my batting so that they were roughly the size of my pillow. I then stuffed the layers inside, smoothed it, added a bit more until it was to my liking and voila… a pillow! Using batting makes for pretty dense and heavy pillows, but it’s a perfect way to use up what you have and to give a decorative pillow dimension.
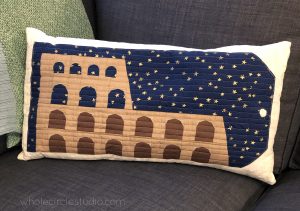
Finished pillow made with the Colosseum Block, part of the Around the World Quilt patterns.

 .
.