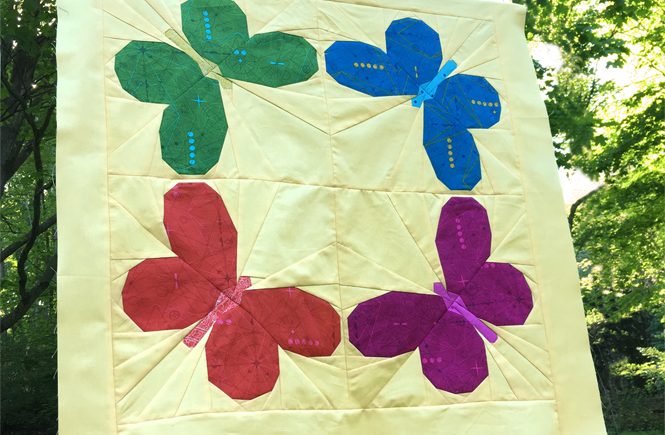
Can you believe it? We’re 3/4 of the way through the Botanical Beauties Block of the Month + Quilt Sew Along! Are you starting to think about how you might quilt your creations? As you are piecing away (and are preparing for the final three block patterns), I’ve been busy using my walking foot to quilt another Botanical Beauties. I’m a bit ahead as I want to inspire and show you some possibilities. Even if you’re not quite ready, it’s never to early to dream up a quilting plan!
Today I’d like to share some helpful quilting strategies that I applied while quilting my latest Botanical Beauties quilt.
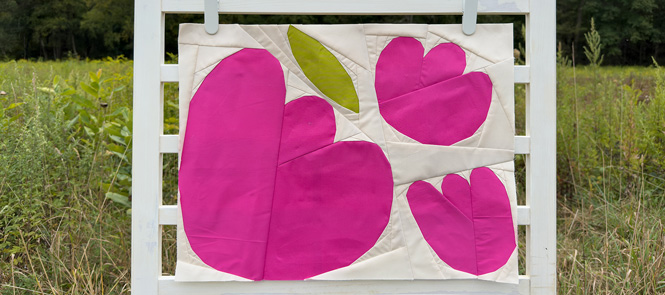
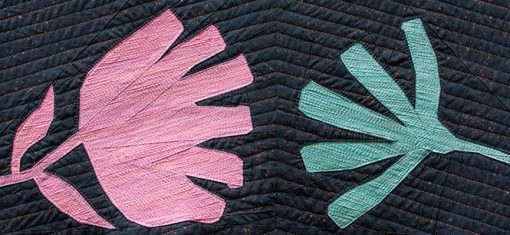
But first…. in case you’re not familiar: Botanical Beauties is a fun foundation paper pieced (FPP) pattern—no curved piecing or applique. The awesome thing about FPP, other than it being incredibly precise, is that you can sew a few straight lines near one another at angles and the result looks like a curve. It’s an easy way to achieve these organic, curvy botanicals! I foundation paper piece a lot, using Aurifil 50wt thread that matches my fabric. I use 50wt so much that in my “go-to” colors, I purchase it by the cone—it’s more economical and I’m less likely to run out in the middle of a project! The 50wt is thin, allowing me to achieve flat seams when I press, yet is strong ensuring my seams remain securely sewn together after the paper is removed.
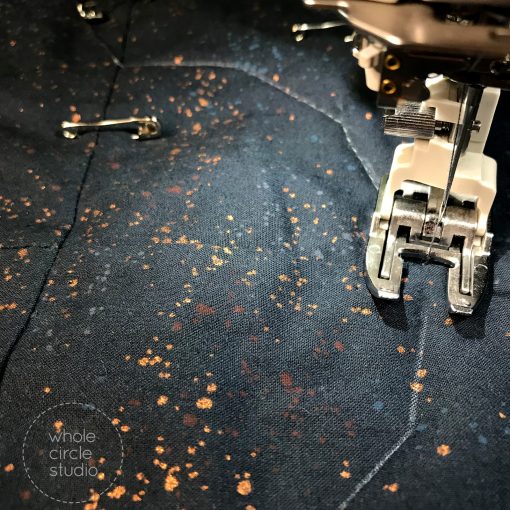
After piecing a quilt top, one of the most fun (and at times overwhelming) parts of making a quilt is deciding how to quilt it. I quilt all of my own projects using a walking foot on my domestic machine. I love the accuracy and results of walking foot quilting.
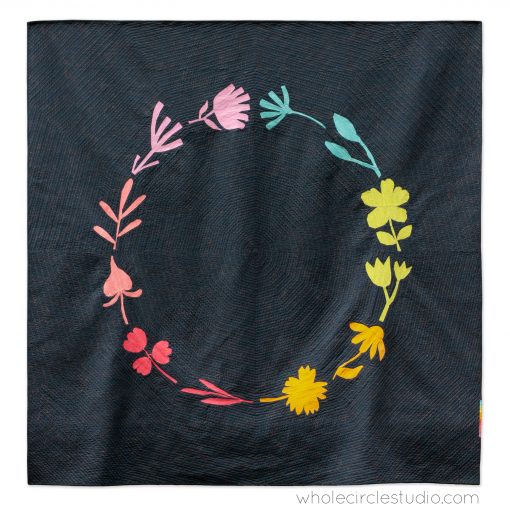
Before quilting this Botanical Beauties quilt, I decided I wanted it to fit my bed, so I added a border, matching the background fabric, to make the quilt 90″ x 90″. The instructions and fabric requirements for the wreath/circle layout of Botanical Beauties are for 70″ x 70. On to the quilting….
Over the years, I’ve developed a variety of quilting design strategies that work well for me. Here are just a few I employed when quilting Botanical Beauties:
1. Match or select complementary thread colors to the fabric colors
I often match my thread color to my fabric so that the quilt top is the star of the show and the quilting supports it. I also find that if my quilting has some imperfections, they’re not usually noticeable when my thread color matches the fabric. As an added bonus, this approach yields a nice colorful quilted surprise on the back of my quilt when I switch thread colors throughout the quilt.
When Aurifil announced the Flora themed 2022 Color Builder series, I was super excited to see that the colors complemented many of the fabric colors I used for my Botanical Beauties blocks.
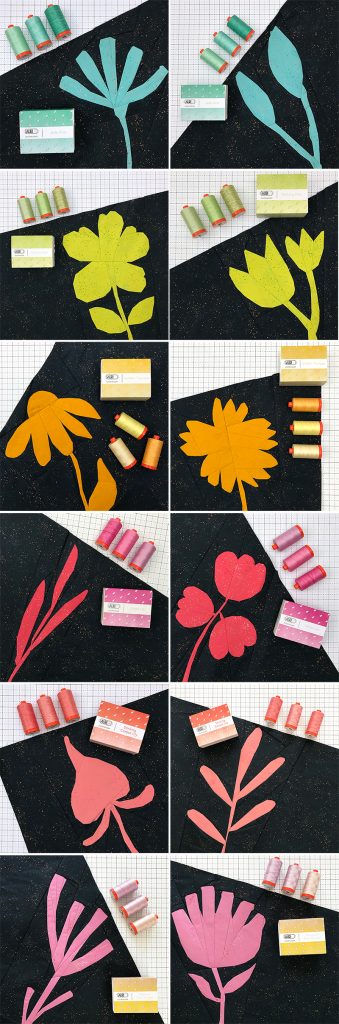
Sometimes I’ll use a couple of tints or shades of one color of thread when quilting in the same area. While subtle, I find that this variation gives the quilting added dimension and visual interest. I rarely use variegated threads since I usually like to know exactly where a thread color will appear on my quilt. Because I fell in love with the Flora Color Builder sets, which include 2 variegated and 1 solid in each box, I challenged myself to step outside the box and use the variegated spools that either contain multiple colors or multiple shades of one color in the same spool. I’m happy I stepped outside of my comfort zone and I’m very pleased with the results in my quilt!
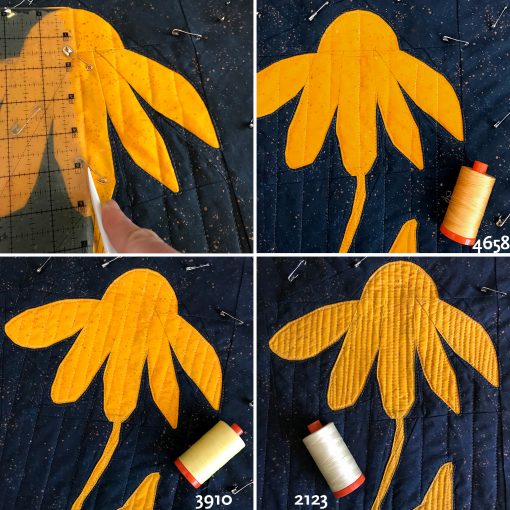
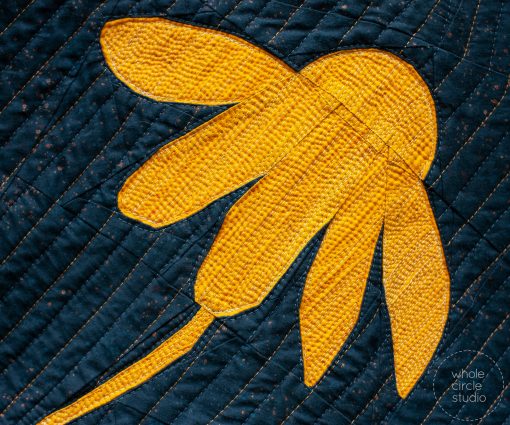
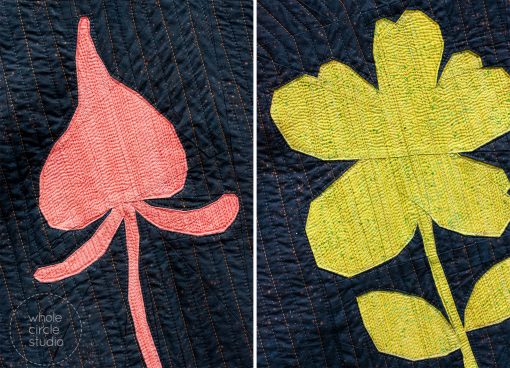
I began quilting each botanical by marking lines every ½” within the botanical with my Hera Marker. If you’re not familiar with this super helpful resource, it’s a plastic tool made by Clover and it creases the fabric. You can then use the creases as a guide to quilt on. The best thing about the creases is they work out on their own, so there’s no need to remove them or worry that they won’t disappear from your quilt top.
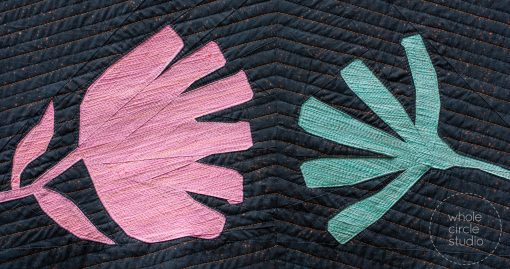
Using my walking foot, I quilted on top of each crease line using the darkest thread in the corresponding 50wt thread set. For block #5, an abstract coneflower (shown), I used the Aurifil Golden Trumpet Color Builder set and used variegated thread color 4658 (Limoni di Monterosso) first. I then quilted between those lines with the variegated color 3910 (Lemon Ice), then quilted between those lines with color 2123 (Butter). I often begin quilting ½” to 1” apart and then keep filling in until I’m happy with the density. In the case of these botanicals, I kept filling in and quilting until the texture was quite dense. This is often referred to as matchstick quilting.
2. Consider incorporating different thread weights.
Giving careful consideration to thread weights and colors can add detail and depth to our quilts, making them extra special. Before I quilted each botanical, I started quilting the negative space in the middle of the quilt. I first auditioned thread colors and weights. If you are able to, it’s always best to lay a single thread on top of your quilt when deciding on weight and color. Simply looking at a thread spool laying on your quilt top doesn’t accurately depict how the stitching will look.

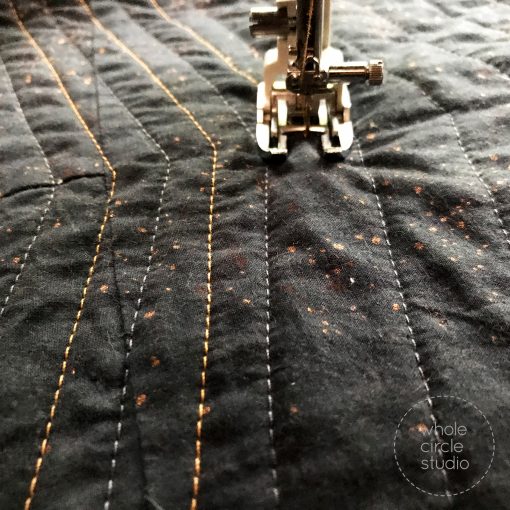
To contrast the 50wt thread I was planning on using to quilt each botanical, I decided to use a thicker 28wt thread for the negative space, alternating with two colors. I used color 1158 (Medium Grey) that matches the navy background and color 2930 (Golden Toast) that is almost on the opposite side of the color wheel, making it a complementary color. If you’re using a thicker weight thread, like a 28wt, be sure to use a thinner 50wt or 40wt thread in your bobbin.
3. Your quilt top design will give you clues on how it wants to be quilted.
Large areas of negative space in a quilt top can be both a blessing and a curse. The possibilities are endless which can be both exciting and overwhelming. If I’m not sure how to quilt an area, I typically take my cues from the quilt top design or by studying the seams. By using this strategy, you can emphasize the piecing of your quilt top and let the overall quilt design shine.
For my Botanical Beauties quilt, I really wanted to accentuate the circle or wreath arrangement of the botanicals. I also thought it would be fitting to introduce a dodecagon, a 12 sided shape, as there are twelve botanicals in the quilt.
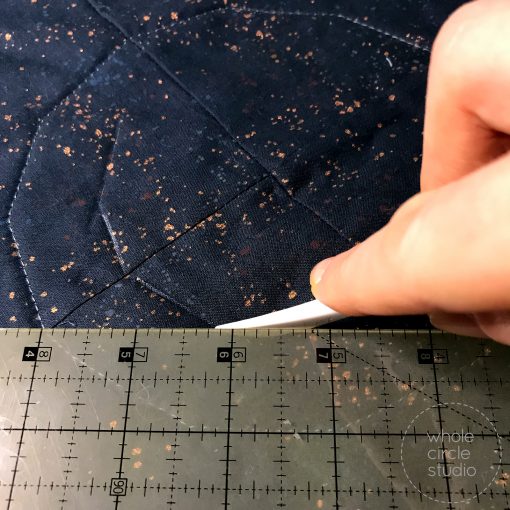
To start, I made a dodecagon template out of cardstock. I then was able to center it on the quilt by inserting a pin through the center of the template and aligning it with the center of the quilt. I then aligned the points on the template with the seams in the quilt top. Once the template was placed where I wanted it, I used double sided tape to secure it to the quilt top.
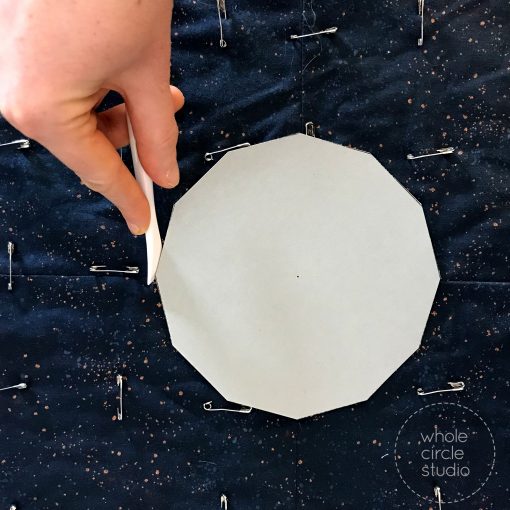
Using my trusty Hera Marker, I made a crease on each side of the dodecagon. The marked line made it easy to quilt the shape.
After the first dodecagon was quilted, I used that quilted shape as a guide to mark the remaining dodecagons, all 1″ apart from the previous one. I quilted all of these lines with color 1158 (Medium Grey)
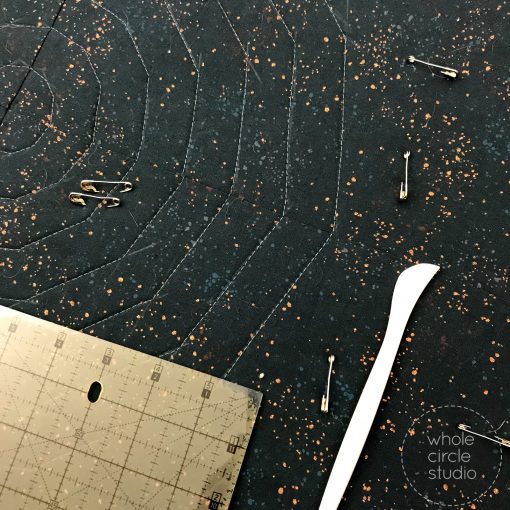
I then went back and filled in between the 1″ quilted dodecagons with color 2930 (Golden Toast), making the quilted lines in the background ½” apart.
I hope this overview has inspired you to try different colors and weights when planning your quilting design. Learn more about the Botanical Beauties quilt pattern here.